
The NDD Print MF HP offers options for automating database configuration.
-
Only administrator users can set up database configurations and must have the necessary permissions for each operation
-
Open the HP NDD Print MF HP interface
-
In the menu, click Tools > Settings
-
Go to the Database tab
-
Select the type of database used (PostgreSQL or SQL Server)
-
Enter the database connection information
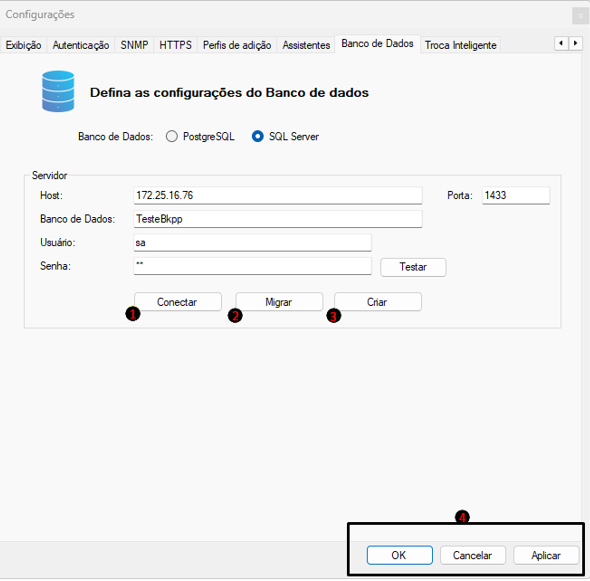
After entering the data, use one of the available options:
Connect
Use the Connect button when the database already exists and contains the NDD Print MF HP tables.
When you click Connect:
-
the system performs a connection test;
-
checks whether the necessary tables exist;
-
automatically saves the database settings.
If the connection is successfully completed, the button will change to Connected.
If the database does not exist, there is a communication failure, or the tables have not been created, an error message will be displayed.
Create
Use the Create button to automatically create a new database with the required structure for the HP NDD Print MF.
When you click Create:
-
the database is created automatically;
-
the necessary tables are created;
-
the connection is established automatically;
-
the configurations are saved automatically.
If a database with the same name already exists, the system will ask if you want to connect to the existing database.
Migrate
Use the Migrate button to transfer data from the current database to a new database.
We recommend that you back up your data before performing migrations
When you click Migrate:
-
the data is migrated automatically;
-
the connection to the new database is established;
-
the configurations are saved automatically.