The NDD Print Client Pantum offers a variety of features that make users' daily tasks easier; some of these functions are configured directly through the NDD Print Embedded Configuration Tool (ECT). These include:
-
Secure Release: When the “Secure Release” feature is enabled, documents will only be printed after the user has explicitly authorized them in the Pantum NDD Print Client.
-
Copies: Improve the message: Allow users to change the number of copies when releasing held documents.
-
Environmental impact: Displays monthly statistics on the environmental impact of the equipment in question.
Below are the instructions for configuring each feature of the NDD Print Client Pantum:


-20250424-142219.png?cb=6b1b76ddadf6e0ae12d201842e6c9187)
Before you begin
-
Install the NDD Print Embedded Configuration Tool (ECT. After installation, to enable any of the functions mentioned above, simply set the switch to the “Enable Releaser” option to display the desired options.
Configure Authentication
Authentication Methods
|
Username and password |
With this authentication method, the user must enter their domain credentials. |
|---|---|
|
PIN and/or Secure PIN |
With this authentication method, the user must enter their PIN and/or PIN and Secure PIN, as configured in the NDD Print Portal 360. |
|
Physical identifier |
With this authentication method, the user must identify themselves at the reader connected to the printer. Self-registration can be enabled so that users can complete the process on the equipment's panel. |
If the device has the NDD Print Client Pantum installed but has not yet received any configuration from the ECT, you will need to launch the application so that the printer is ready to receive the ECT configuration for the first time.
The following screen appears when receiving the configuration for the first time
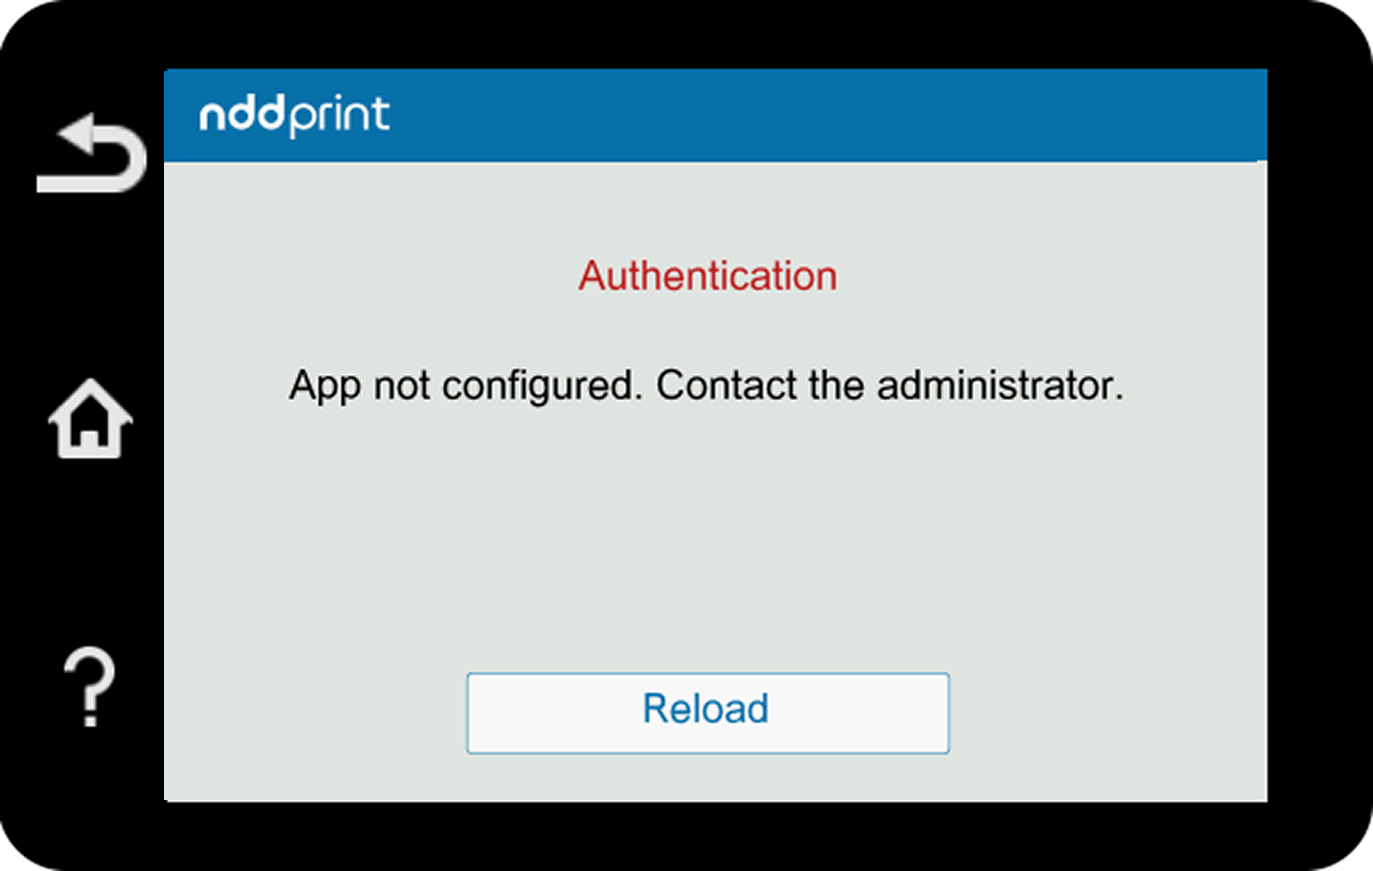
If the printer has already received the settings, you do not need to open the NDD Print Client Pantum app.
Set up Secure Release
Before you begin
-
Be sure to configure authentication on the NDD Print Host.
-
Be sure to add the printer to the NDD Print Releaser.
When you enable the “secure release” feature, documents will only be printed after the user has explicitly authorized them in the NDD Print Client Pantum.
-
Open NDD Print ECT (Embedded Configuration Tool)
-
Select the manufacturer Pantum
-
Select the “Configure” option
-
In the “Single Printer” section, enter the IP address or hostname of the device you want to configure
-
In the NDD Print Client section, select Enable Releaser
-
In the Local server section, fill in the fields:
-
NDD Print Host: Server address (IP address or hostname) where the NDD Print Host component is installed
-
NDD Print Releaser: Server address (IP address or hostname) where the NDD Print Releaser component is installed
-
-
Click “Send to printers”
Set Up Copies
Release of copies
Allow users to change the number of copies when releasing held documents.
-
Open the NDD Print ECT (Embedded Configuration Tool)
-
Select the manufacturer Pantum
-
Select the “Configure” option
-
In the “Single Printer” section, enter the IP address or hostname of the device you want to configure
-
In the NDD Print Client section, select “Enable Releaser” to display the options, and then select “Release Copies Settings”
-
In the “Local server” section, fill in the fields:
-
NDD Print Host: Server address (IP address or hostname) where the NDD Print Host component is installed
-
NDD Print Releaser: Server address (IP address or hostname) where the NDD Print Releaser component is installed
-
-
Click “Send to printers”
Restrict access to the printer's copy functions
Allow users to change the number of copies when releasing held documents.
-
Open the NDD Print ECT (Embedded Configuration Tool)
-
Select the manufacturer Pantum
-
Select the “Configure” option
-
In the “Single Printer” section, enter the IP address or hostname of the device you want to configure
-
In the NDD Print Client section, select Enable Releaser to display the options, and then select Allows to limit access to the printer’s copy features
-
In the “Local server” section, fill in the fields:
-
NDD Print Host: Server address (IP address or hostname) where the NDD Print Host component is installed
-
NDD Print Releaser: Server address (IP address or hostname) where the NDD Print Releaser component is installed
-
-
Click “Send to printers”
Configure Environmental Impact
Displays monthly statistics on environmental impact.
-
Open the NDD Print ECT (Embedded Configuration Tool)
-
Select the manufacturer Pantum
-
Select the “Configure” option
-
In the “Single Printer” section, enter the IP address or hostname of the device you want to configure
-
In the NDD Print Client section, select “Enable Releaser” to display the options, and then select “Environmental Impact”
-
In the “Local server” section, fill in the fields:
-
NDD Print Host: Server address (IP address or hostname) where the NDD Print Host component is installed
-
NDD Print Releaser: Server address (IP address or hostname) where the NDD Print Releaser component is installed
-
-
Click “Send to printers”
All of the features mentioned above can be sent in bulk to multiple printers. To do this, click “Import file” to import a CSV file containing the printer addresses for bulk configuration.
Common errors
When sending the settings to the NDD Print Client, some errors may occur.
Click “Save not configured” to save a CSV file containing the printers that returned an error.
|
Error Code |
Possible causes |
|---|---|
|
Error #001 |
|
|
Error #002 |
|
|
Error #003 |
|
|
Error #004 |
|
|
Error #005 |
|
|
Error #006 |
|
|
Error #007 |
|
|
Error #008 |
|
|
Error #009 |
|
|
Error #010 |
|