In this article, you'll learn how to set up and configure the PostgreSQL database to use NDD Print MF Epson.
Before you start
-
This configuration is applicable only to scenarios in which the installation or update of NDD Print MF Epson was carried out using the option "I have a PostgreSQL database and I want to use it".
-
This configuration must be carried out before adding new printers to NDD Print MF Epson.
-
It is recommended that you always use a dedicated database for NDD Print MF Epson.
-
We recommend that you make a backup of the database.
Step 1: Create the database
This step is only for cases where you don't have a database created.
This tutorial was created using pgAdmin 4 8.9.
-
Open the pgAdmin interface
-
Click on Object > Create > Database
-
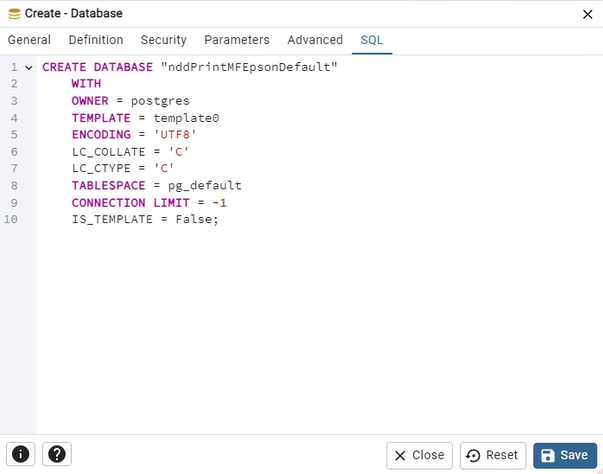
In the General tab, fill in the name of the database and the Owner
The Owner user must have read and write permission on the database.
-
In the SQL tab you can see a summary of the database settings:
-
Click on Save
Step 2: Configuring database access
-
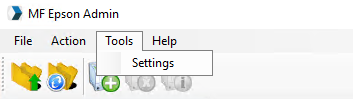
Open the NDD Print MF Epson interface
-
In the menu, click on Tools > Settings
-
Select PostgreSQL
-
Fill in the database information
If you use a user with permission to create, NDD Print MF Epson will create the tables in the selected database. If you don't have permission to create, use the SQL script.
-
Click Apply > OK
Step 3: Create the database tables
-
Go to the NDD Print MF Epson installation folder
-
Open the
CreateDatabasePostgres.sqlfile and copy its contents -
In pgAdmin, right-click on the created database
-
Click on Query tool
-
Paste the contents of the
CreateDatabasePostgres.sqlfile and click execute
-
When finished, configure access to the database
Common errors
|
Errors |
Solution |
|---|---|
|
Check that the postgreSQL service is running. |