This section describes the licensing and distribution procedure for NDD Print Client and NDD Print CollectorCOMING SOON.
Licensing applications
Step 1: Generate the CSV file with the serial number(s)
-
Create a CSV file
-
Enter the serial numbers that will be licensed
Each serial number must be on a separate line and must not contain any special characters or spaces.
-
Save the file
Step 2: Send for licensing
Depending on the location of the equipment, send the file to the e-mail address:
|
Europe, Middle East and Africa (EMEA) |
saleseurope@nddprint.com |
|---|---|
|
Latin America (LATAM) |
assiscom@ndd.tech |
Serial numbers must be sent at least 24 hours before installation, and licensing will only be carried out during business hours.
You will be replied to in the same e-mail with the installation and licensing file.
Distributing the applications
Download the applications according to the licensing region (EMEA or LATAM)
|
Download content |
Description |
|---|---|
|
NDD Print Client Canon (LATAM) |
Authentication (Client) and Secure Release (Access) applications registered in the LATAM region. |
|
NDD Print Client Canon (EMEA) |
Authentication (Client) and Secure Release (Access) applications registered in the EMEA region. |
|
COMING SOON NDD Print Collector Canon (LATAM) |
Monitoring application registered in the LATAM region. |
|
COMING SOON NDD Print Collector Canon (EMEA) |
Monitoring application registered in the EMEA region. |
-
In the iWEMC tool
-
Select Data Management > Applications
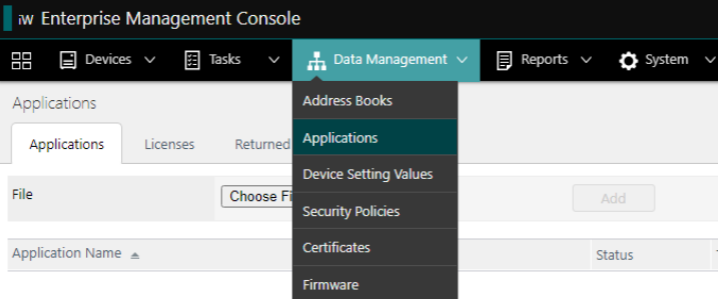
Applications -
In the Applications tab, click on Choose file
-
Select the .jar file of the NDD Print application you downloaded earlier
-
On the Licenses tab, click Choose file
-
Select the .lic file according to the application you want to distribute
The license file must be related to the application you want to distribute.
-
Click Add
-
Activate the button for the license you want to distribute

Licenses
Setting up the application distribution task
-
Select Tasks > Task list
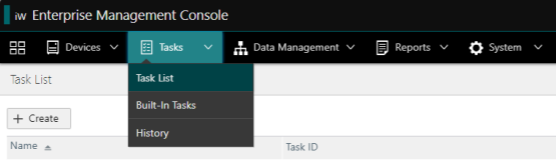
Task list -
Click the + Create button
-
Search for [Application] Install/Update Applications
-
Now we have to configure the 2 tabs:
|
Scheduled |
|
|---|---|
|
Task-Specific Settings |
|
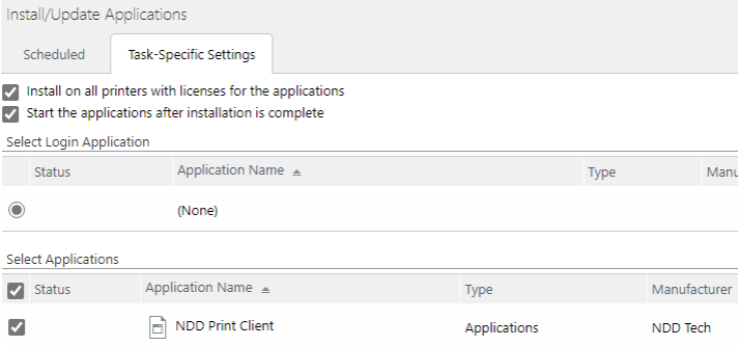
-
Click on Add