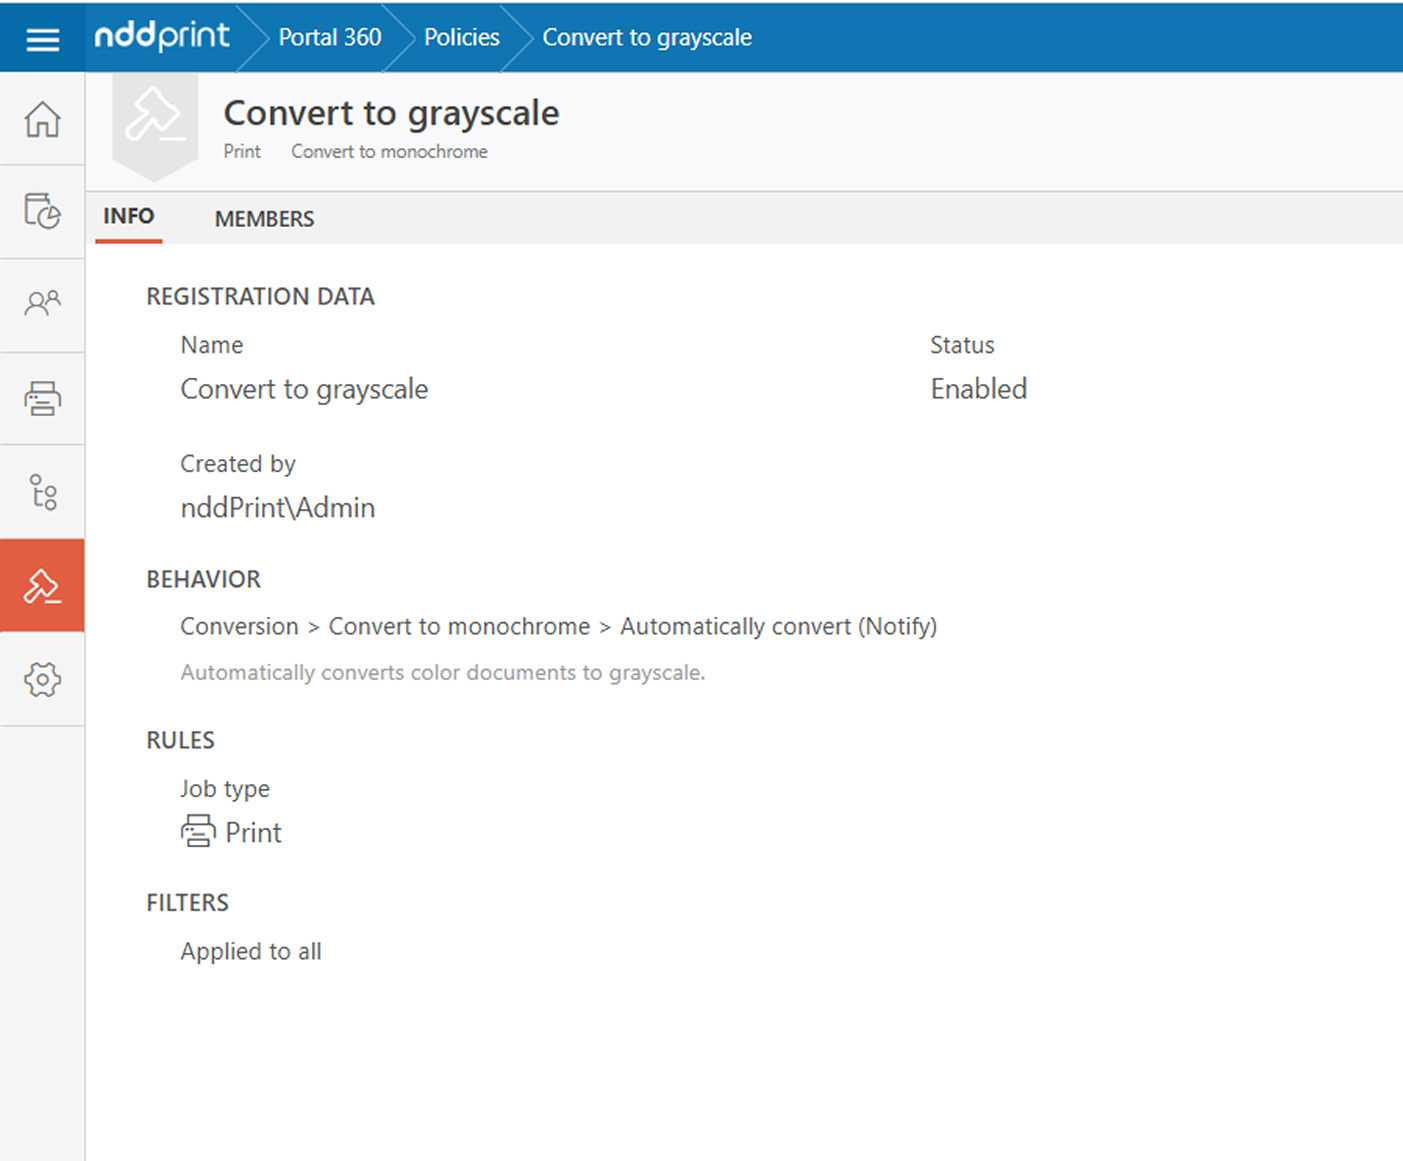
Automates the conversion of color prints to black and white, allowing you to save resources such as printer toner. In our example, we will convert all prints from a group of users to monochrome whenever they send a color print.
Have questions? Check out our FAQ anytime to get quick answers!
This guide is intended to illustrate how to use the conversion policy; please make the necessary adjustments based on your environment.
Configure the Policy
-
Go to the NDD Print Portal 360
-
Navigate to Policies > + Create
-
Name the policy
-
Check the box Enable use of this policy
-
Under Policy Type, select Both
-
Under Job Type, choose Printing
-
Under Filters, select Apply to all
-
Under Behavior, choose Conversion > Convert to monochrome
-
Under Action, select Convert automatically
Customize the message that will be displayed to the user by unchecking the Use default notification option.
-
Under Members, select Define members
-
Click Add > User group and select the group

-
Click Save
Synchronize the policy
This procedure ensures that NDD Print Host receives the new configurations from NDD Print Portal 360.
By default, NDD Print Host checks for new configurations every hour.
-
Open NDD Print Host.
-
Go to Tools > Synchronize.
-
Click Synchronize to ensure that the policies are applied.
You can view the active policies on the NDD Print Host dashboard, in the Policy Settings section.
Restart the NDD Print Agent services
This procedure ensures that the NDD Print Agent receives the new configurations from the NDD Print Host.
The NDD Print Agent checks for new configurations every 30 minutes.
-
Open Windows Services.
-
Restart the following NDD Print Agent services:
-
Guardian
-
Http server
-
Listener
-
Sender
-
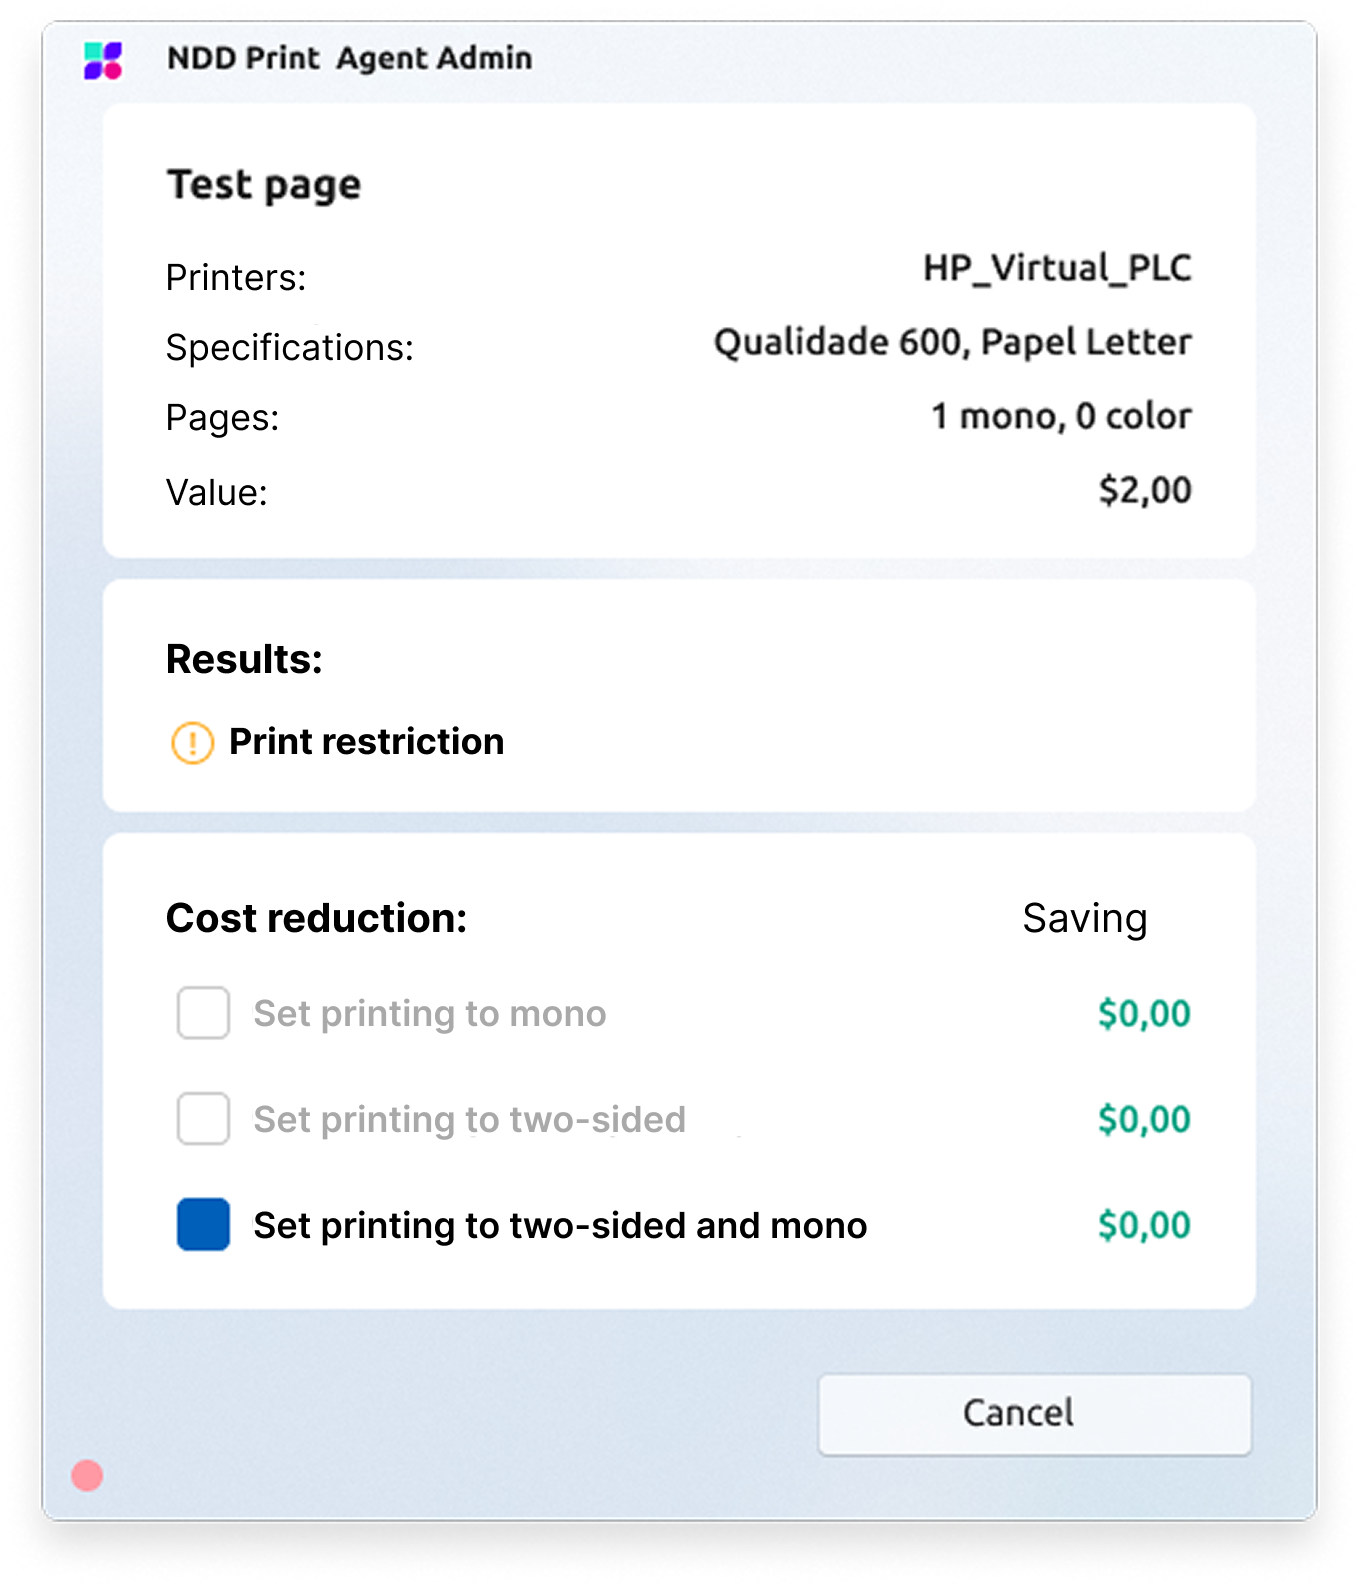
Using the blocking policy
After completing the policy configuration, it’s time to test it.
-
Open a document that contains colored content
-
Send it to print
The expected behavior is for a pop-up from the NDD Print Agent to appear with the conversion information.
Learn more about the policies
Modules and architecture
Discover the essential modules for policy implementation, learn about their structure, and find out how to use them.
Configuration
Learn how to configure and manage policies in NDD Print Portal 360 to control your printing features.