Environment Prerequisites:
Virtual machine application monitoring and management must be installed
The prerequisites must be attended
-
Run the NDD Print Releaser installer;
It will display a screen for the language selection; -
Choose the desired language, and click "OK";
The installation wizard will identify that its running on a Windows Server 2012 R2 and ask which installation type is desired: standard or cluster. -
Select the option "Installation in Cluster" and click "Next".
You'll be requested to enter the print resource's name (Print Spooler). -
Enter the name and click "Next".
You'll be requested to inform the installation folder. -
Enter the installation directory and click "Next".
You'll be requested to inform the work folder. -
Enter the work folder and click "Next".
You'll be requested to enter the hostname or IP Address of the NDD Print Host; -
Enter the server address of the NDD Print Host and click "Next".
In this step the Wizard will display a summary of the configurations, if you want to change any of them, click "Back"; -
Read the summary and click "Install";
You will be informed when the process is over. -
Click 'Finish".
For the work folder, it commonly uses the system default folder, "\Program Files\(Program Files)", however, due to the big flow of data, it is recommended to use a partition or HD apart from the O.S.
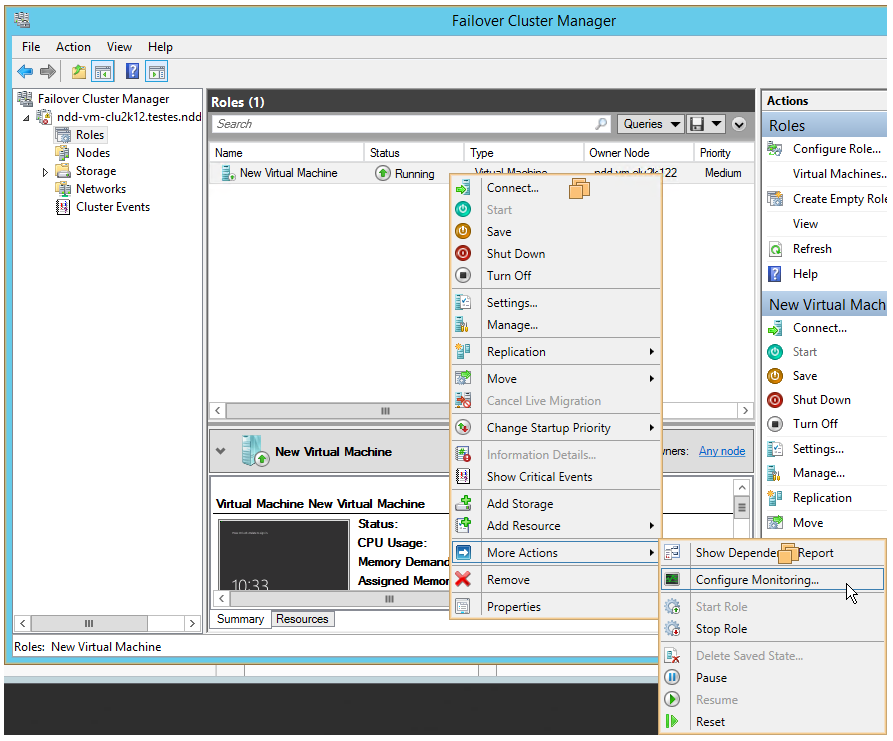
After installing the application in the Cluster system, configure the services:
To configure the services to be monitored, click on Start Menu > Failover Cluster Manager> Roles > in the virtualization list right click on the desired virtualization > More Actions > click on Configure Monitoring ...
-
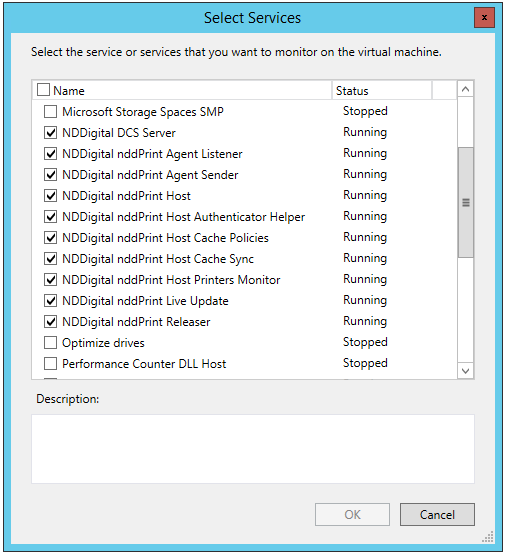
Enable all NDDigital services to be monitored, as well as the cluster print service, and click "OK."
-
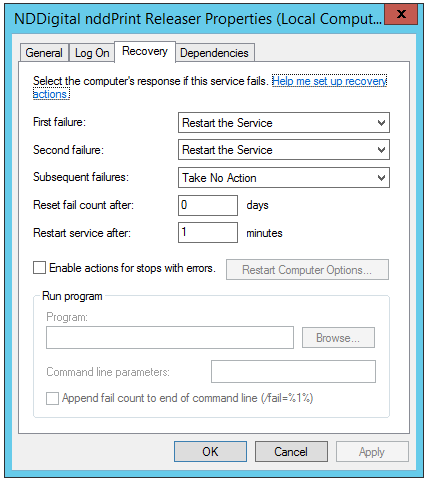
In the properties of the enabled services, configure the recovery options:
-
First Failure: Restart the service;
-
Second failure: Restart the service;
-
Subsequent failures: Take no Action.
-
After configuring the service, the Cluster will be working properly.