This document provides a detailed description of the process for creating the NDD Print Releaser print group in a high-availability environment
Creating Generic Services in the Cluster
To create the Releaser generic service in the cluster, follow the steps below:
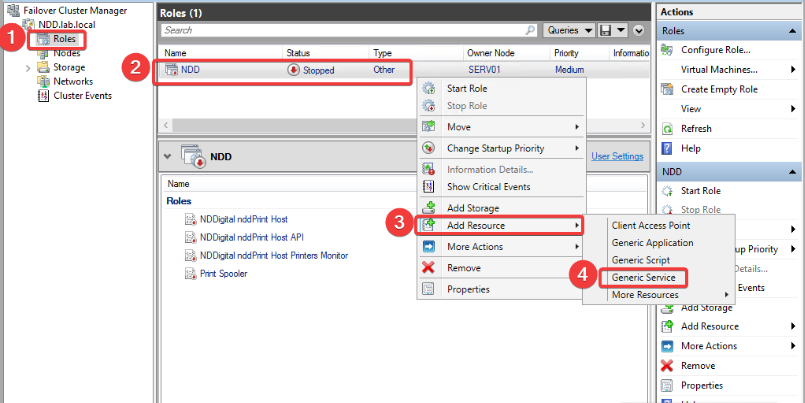
Access the Failover Cluster Manager
-
Navigate to the Roles tab
-
Right-click
-
Select:
Add Resource > Generic Service
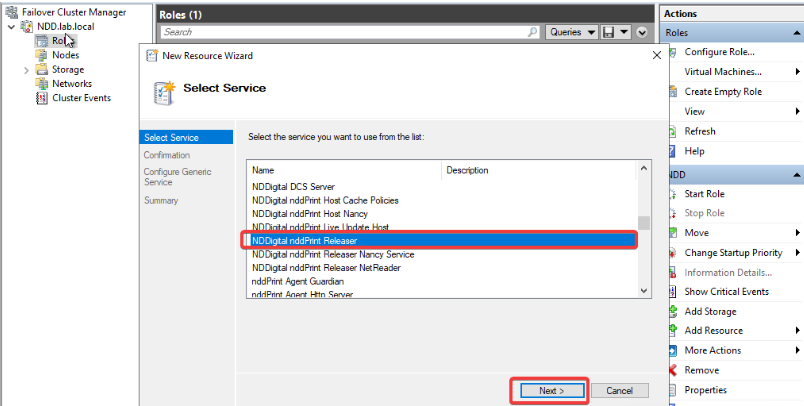
After selecting Generic Service, a screen displaying the list of available services will appear:
-
Locate the Releaser service on the corresponding server.
-
Select the service and click Next.
-
A confirmation screen will appear to complete the process.
-
Finish creating the generic service.
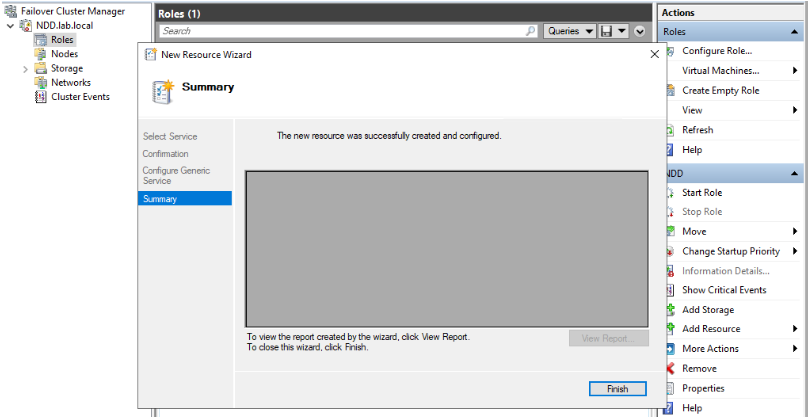
After that, the Generic Service will be created in the cluster.

Important - Correct Configuration Order
To ensure the stability of the environment, you must follow this sequence:
-
Create the Print Group
-
Configure Generic Services on the cluster
Note:
If generic services are started before the print group is created, failures may occur. This happens because the Releaser may restart services during the process, and in a cluster this can cause the active node to be automatically migrated, interrupting the operation.
Scenario: Creating the group after deployment
If you need to create the print group after deployment, with the generic services already installed and running on the cluster, you will need to temporarily stop those services in order to create the group.
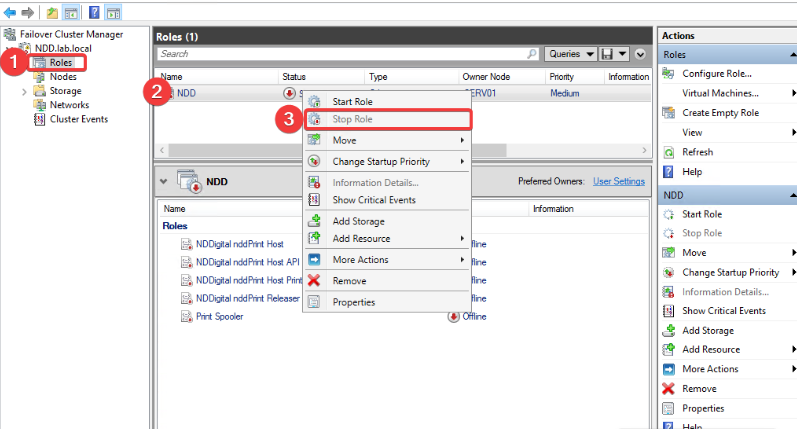
Step 1 – Stop the generic services
Access the Failover Cluster Manager.
-
Navigate to Roles.
-
Right-click the service.
-
Select Stop Role.
-
On the Node (active), open the Releaser interface.
-
Create the print group as described in the manual.
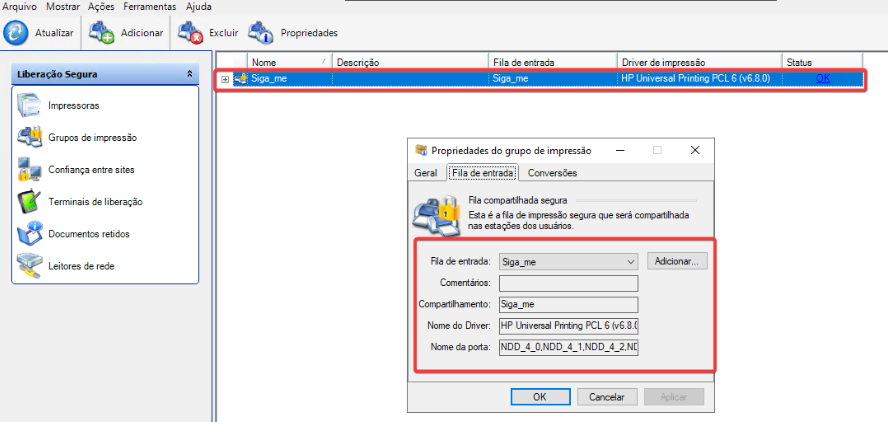
After creation, verify that all fields have been properly filled out on the server where the group was created.
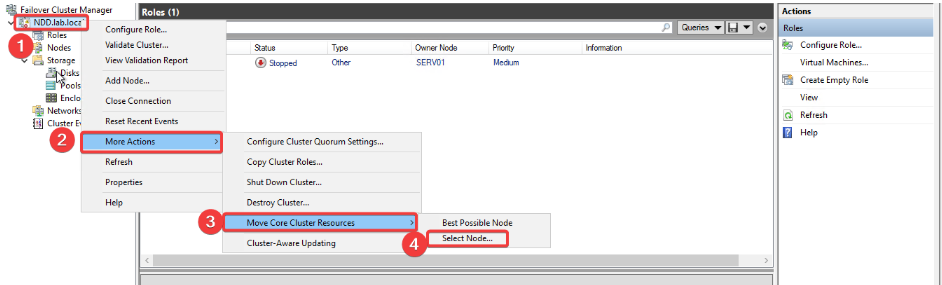
Step 2 - Additional configuration to complete the creation of the print group on server 2
-
In Failover Cluster Manager, right-click the cluster name.
-
Navigate to:
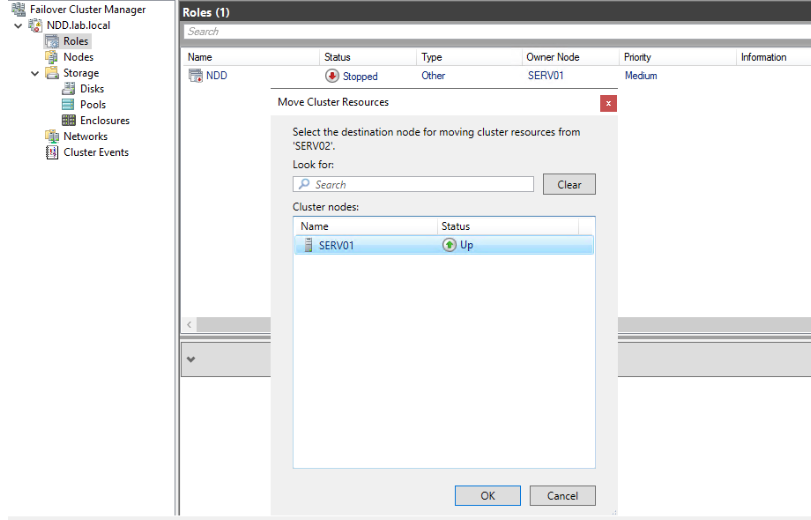
More Actions > Move Core Cluster Resources > Select Node
-
Select Node 2.
Step 3 – Configuration on the NDD Print Releaser server
-
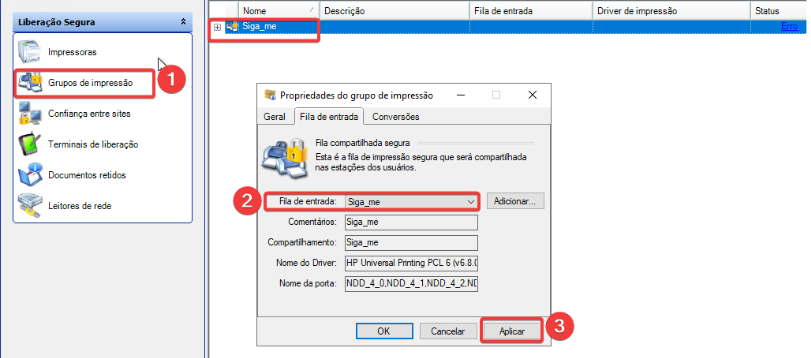
On the NDD Print Releaser server, go to the Print Groups tab.
-
Select the group you created and open Properties.
-
Go to the Inbound Queue tab.
Note:
The print group will be listed, but you will still need to configure the ports.
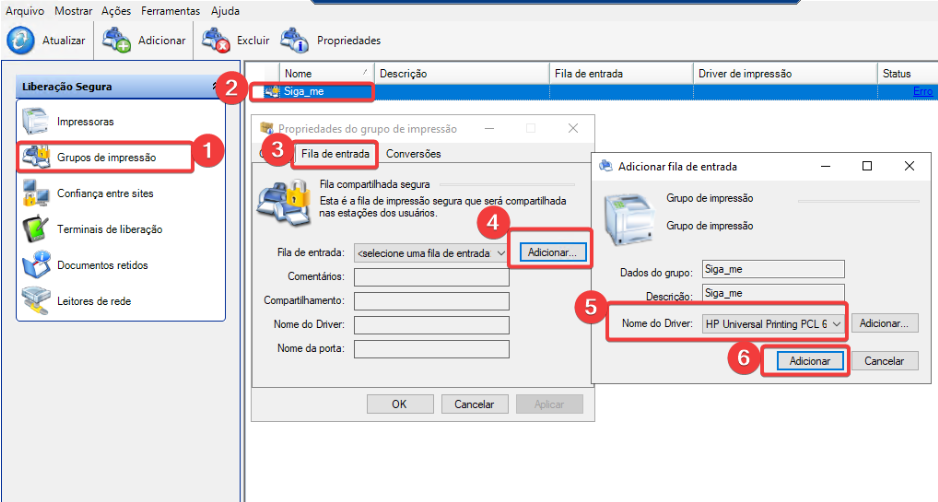
-
Click Add.
-
In the Add Inbound Queue window, select the driver to be used.
-
Click Add to finish.
After creating the ports:
-
Return to Print Groups
-
On the Input Queue tab, select the queue you created.
-
The fields will be filled in automatically.
-
Click Apply and then OK to save.
Conclusion
After completing the creation of the virtual print group:
-
Return to the Failover Cluster Manager.
-
Restart the generic services (Start Role).
This will successfully complete the configuration of the print group and the generic services.