This guide describes how to create and configure an Enterprise Application in Microsoft Entra ID to provision NDD Print SCIM.
Before you begin:
-
You must have access and elevated permissions on the Azure/Microsoft Entra ID portal, as well as a basic understanding of the platform.
-
In NDD Print Portal 360, the domain integrated with Microsoft Entra ID must be created and configured beforehand, before you begin provisioning.
Configuration in Microsoft Azure ID (Azure)
Access Microsoft Azure ID
-
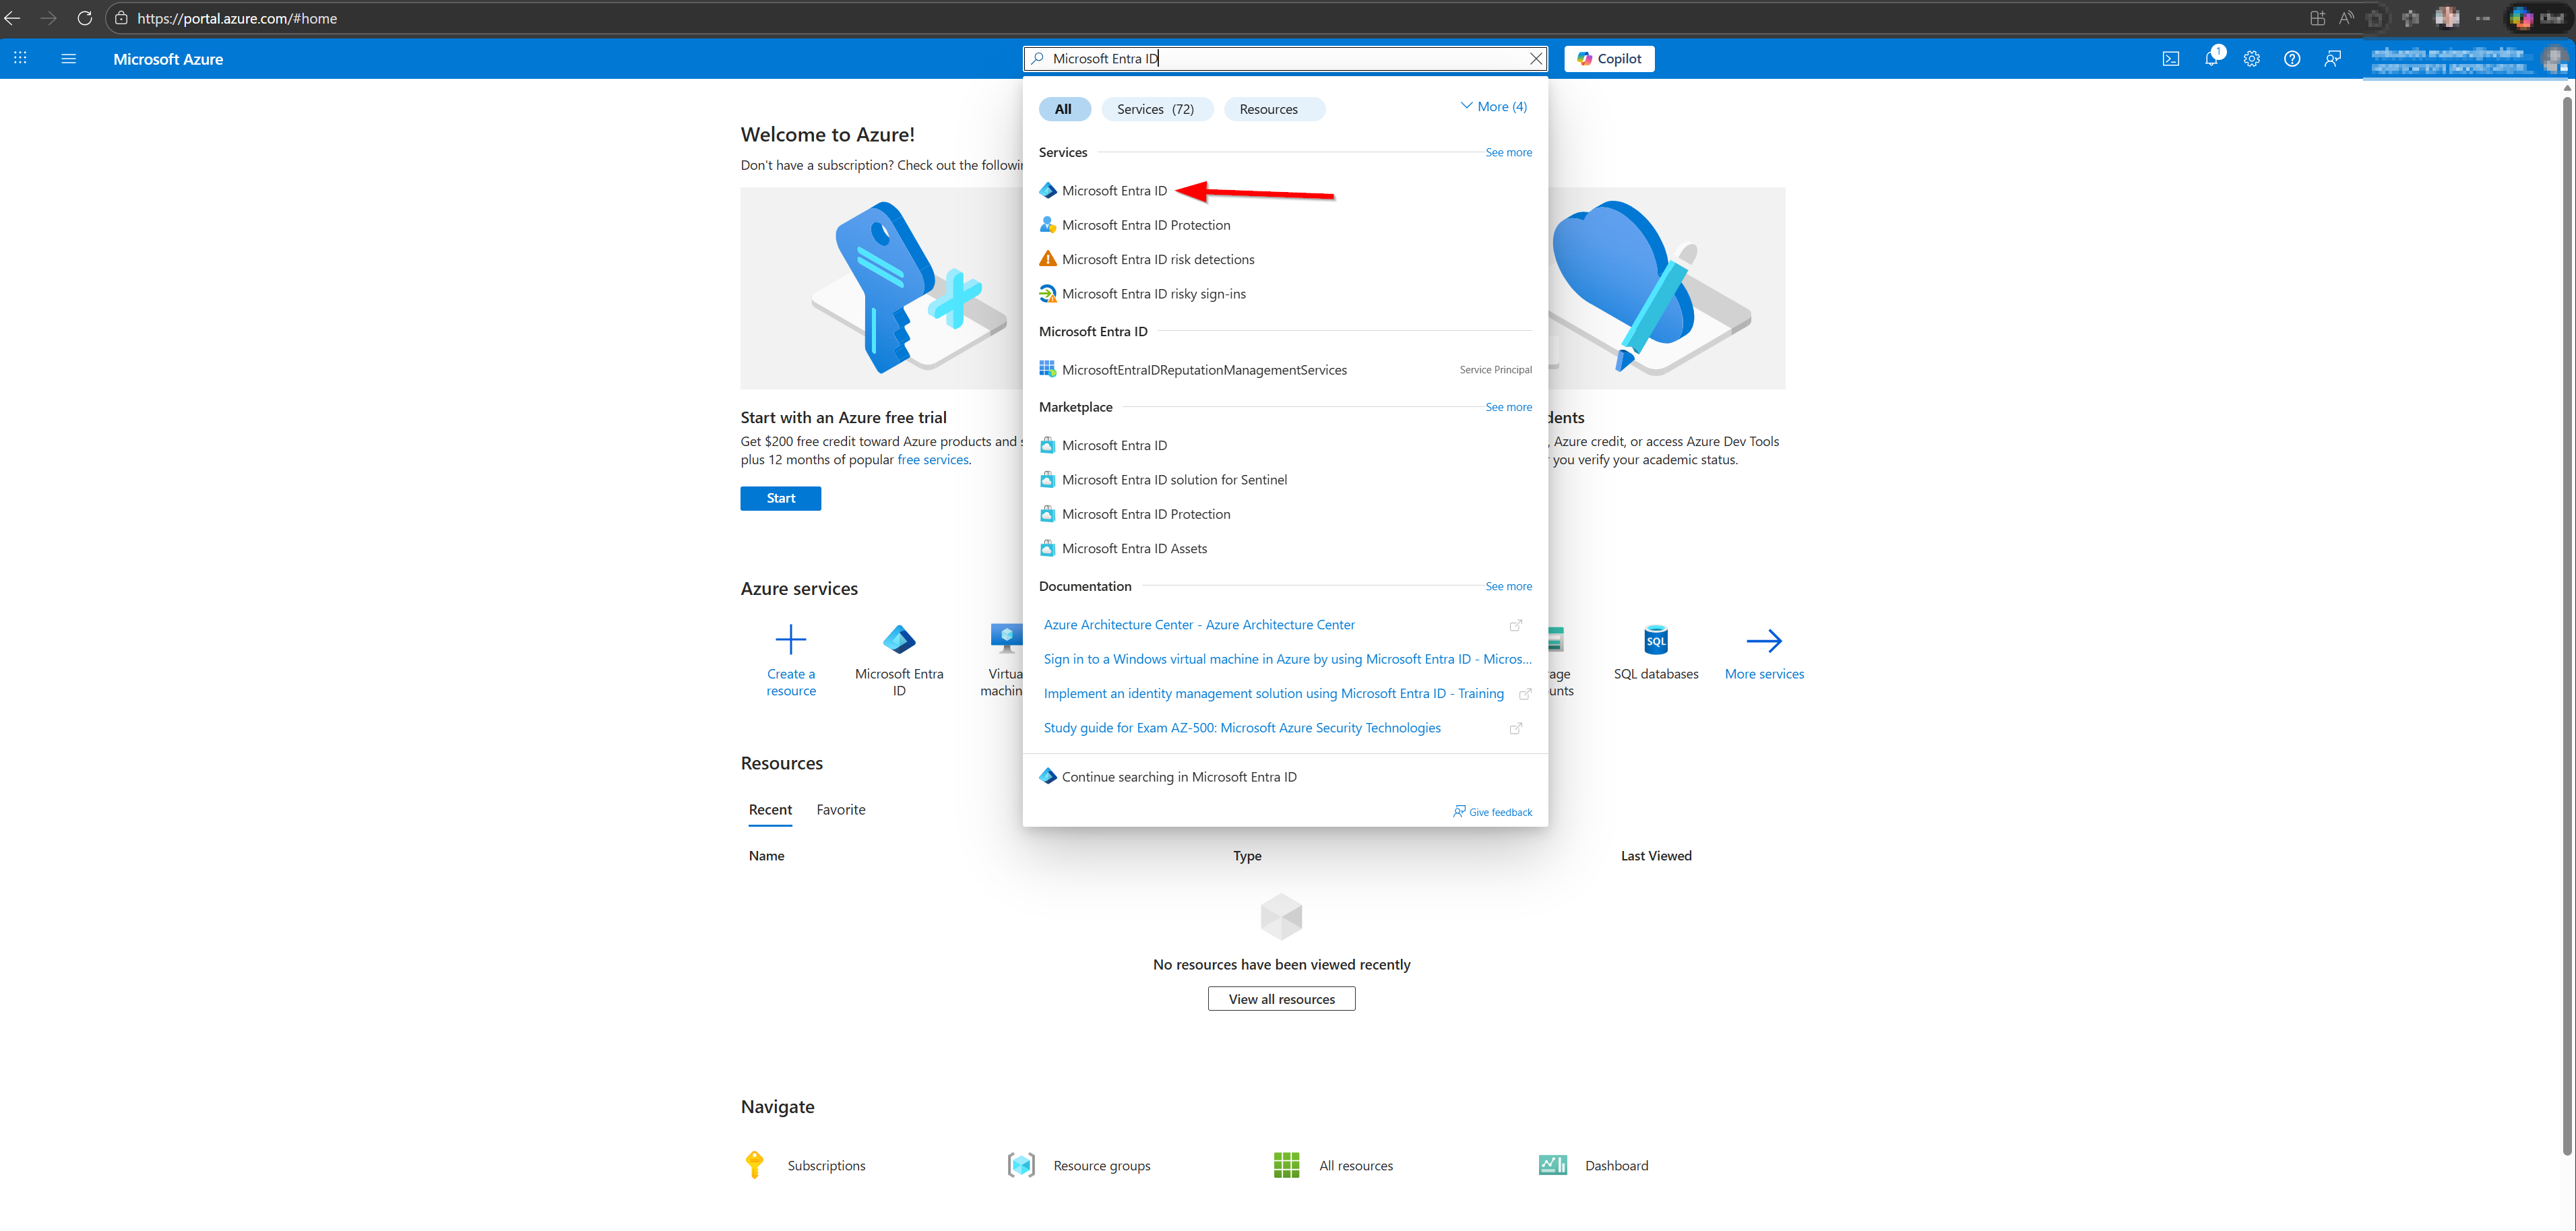
Open the Azure Portal.
-
In the search bar, search for Microsoft Azure ID:
Create an Enterprise Application
-
In the left-hand menu, expand Manage and click ‘Enterprise Applications’:
-
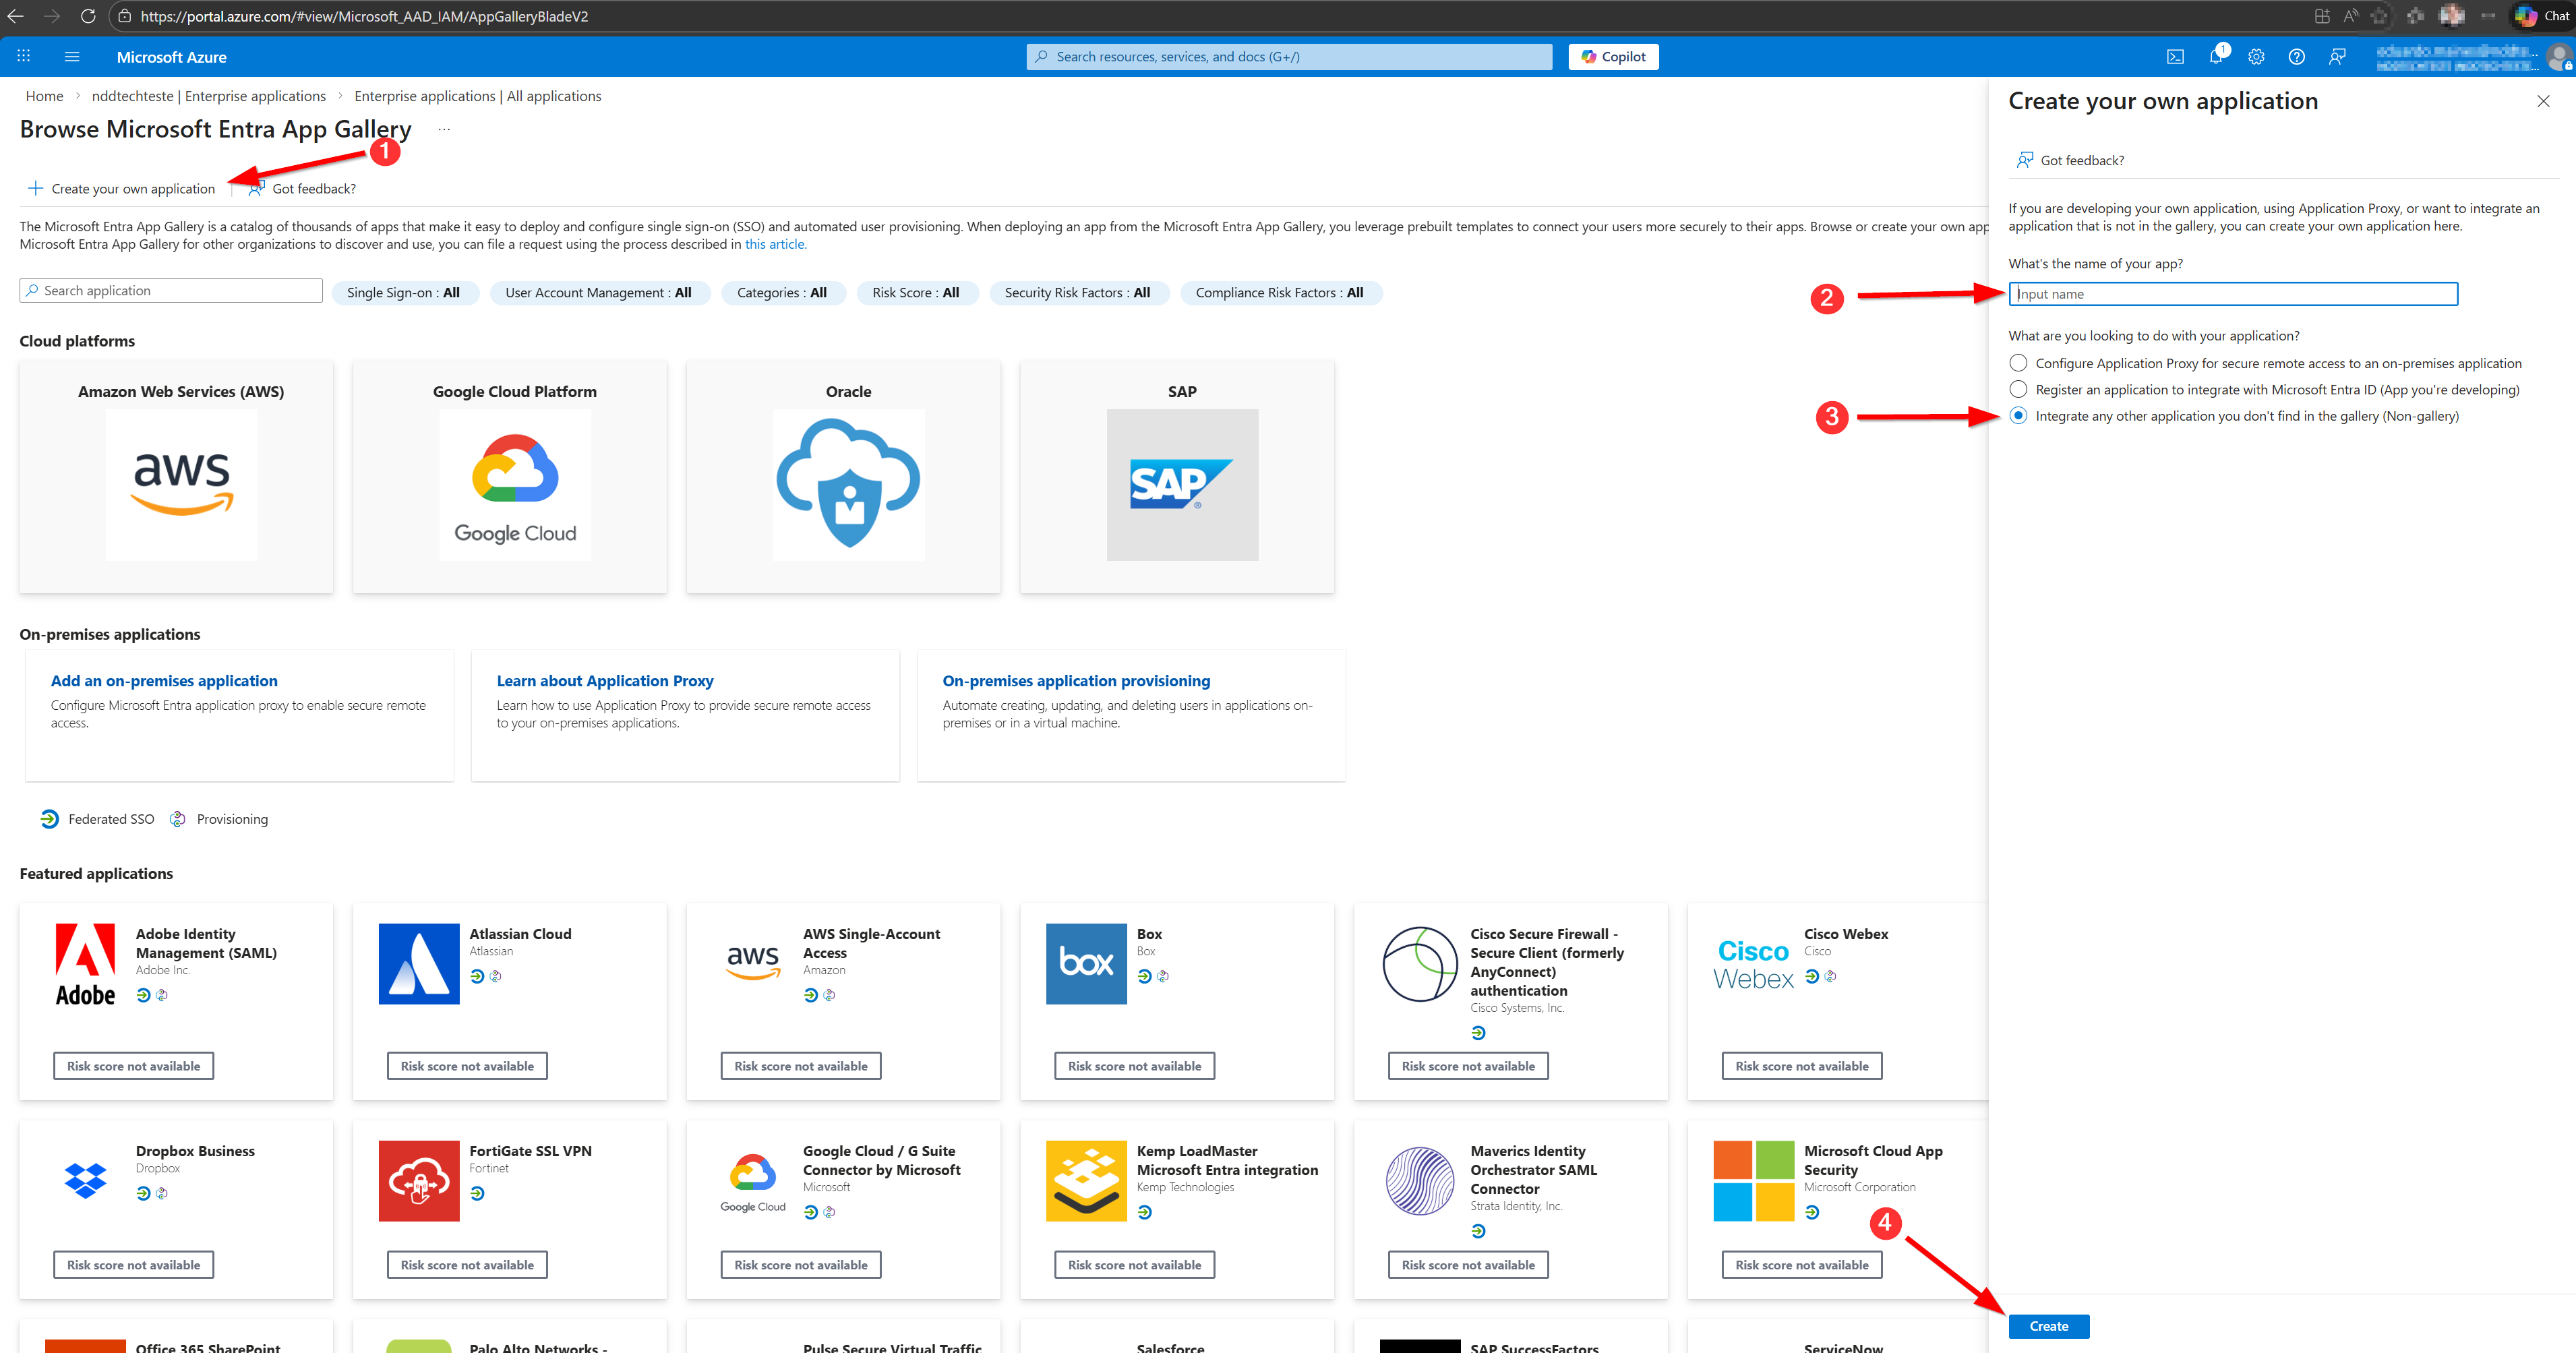
In the top menu, click ‘New Application’.
-
Click ‘Create your own application’.
-
Fill in:
-
Application Name (define a name that identifies Portal 360/SCIM).
-
Select the option: “Integrate any other application that you cannot find in the gallery (Not from the gallery)”.
-
-
Click Create:
Configure Provisioning (SCIM)
-
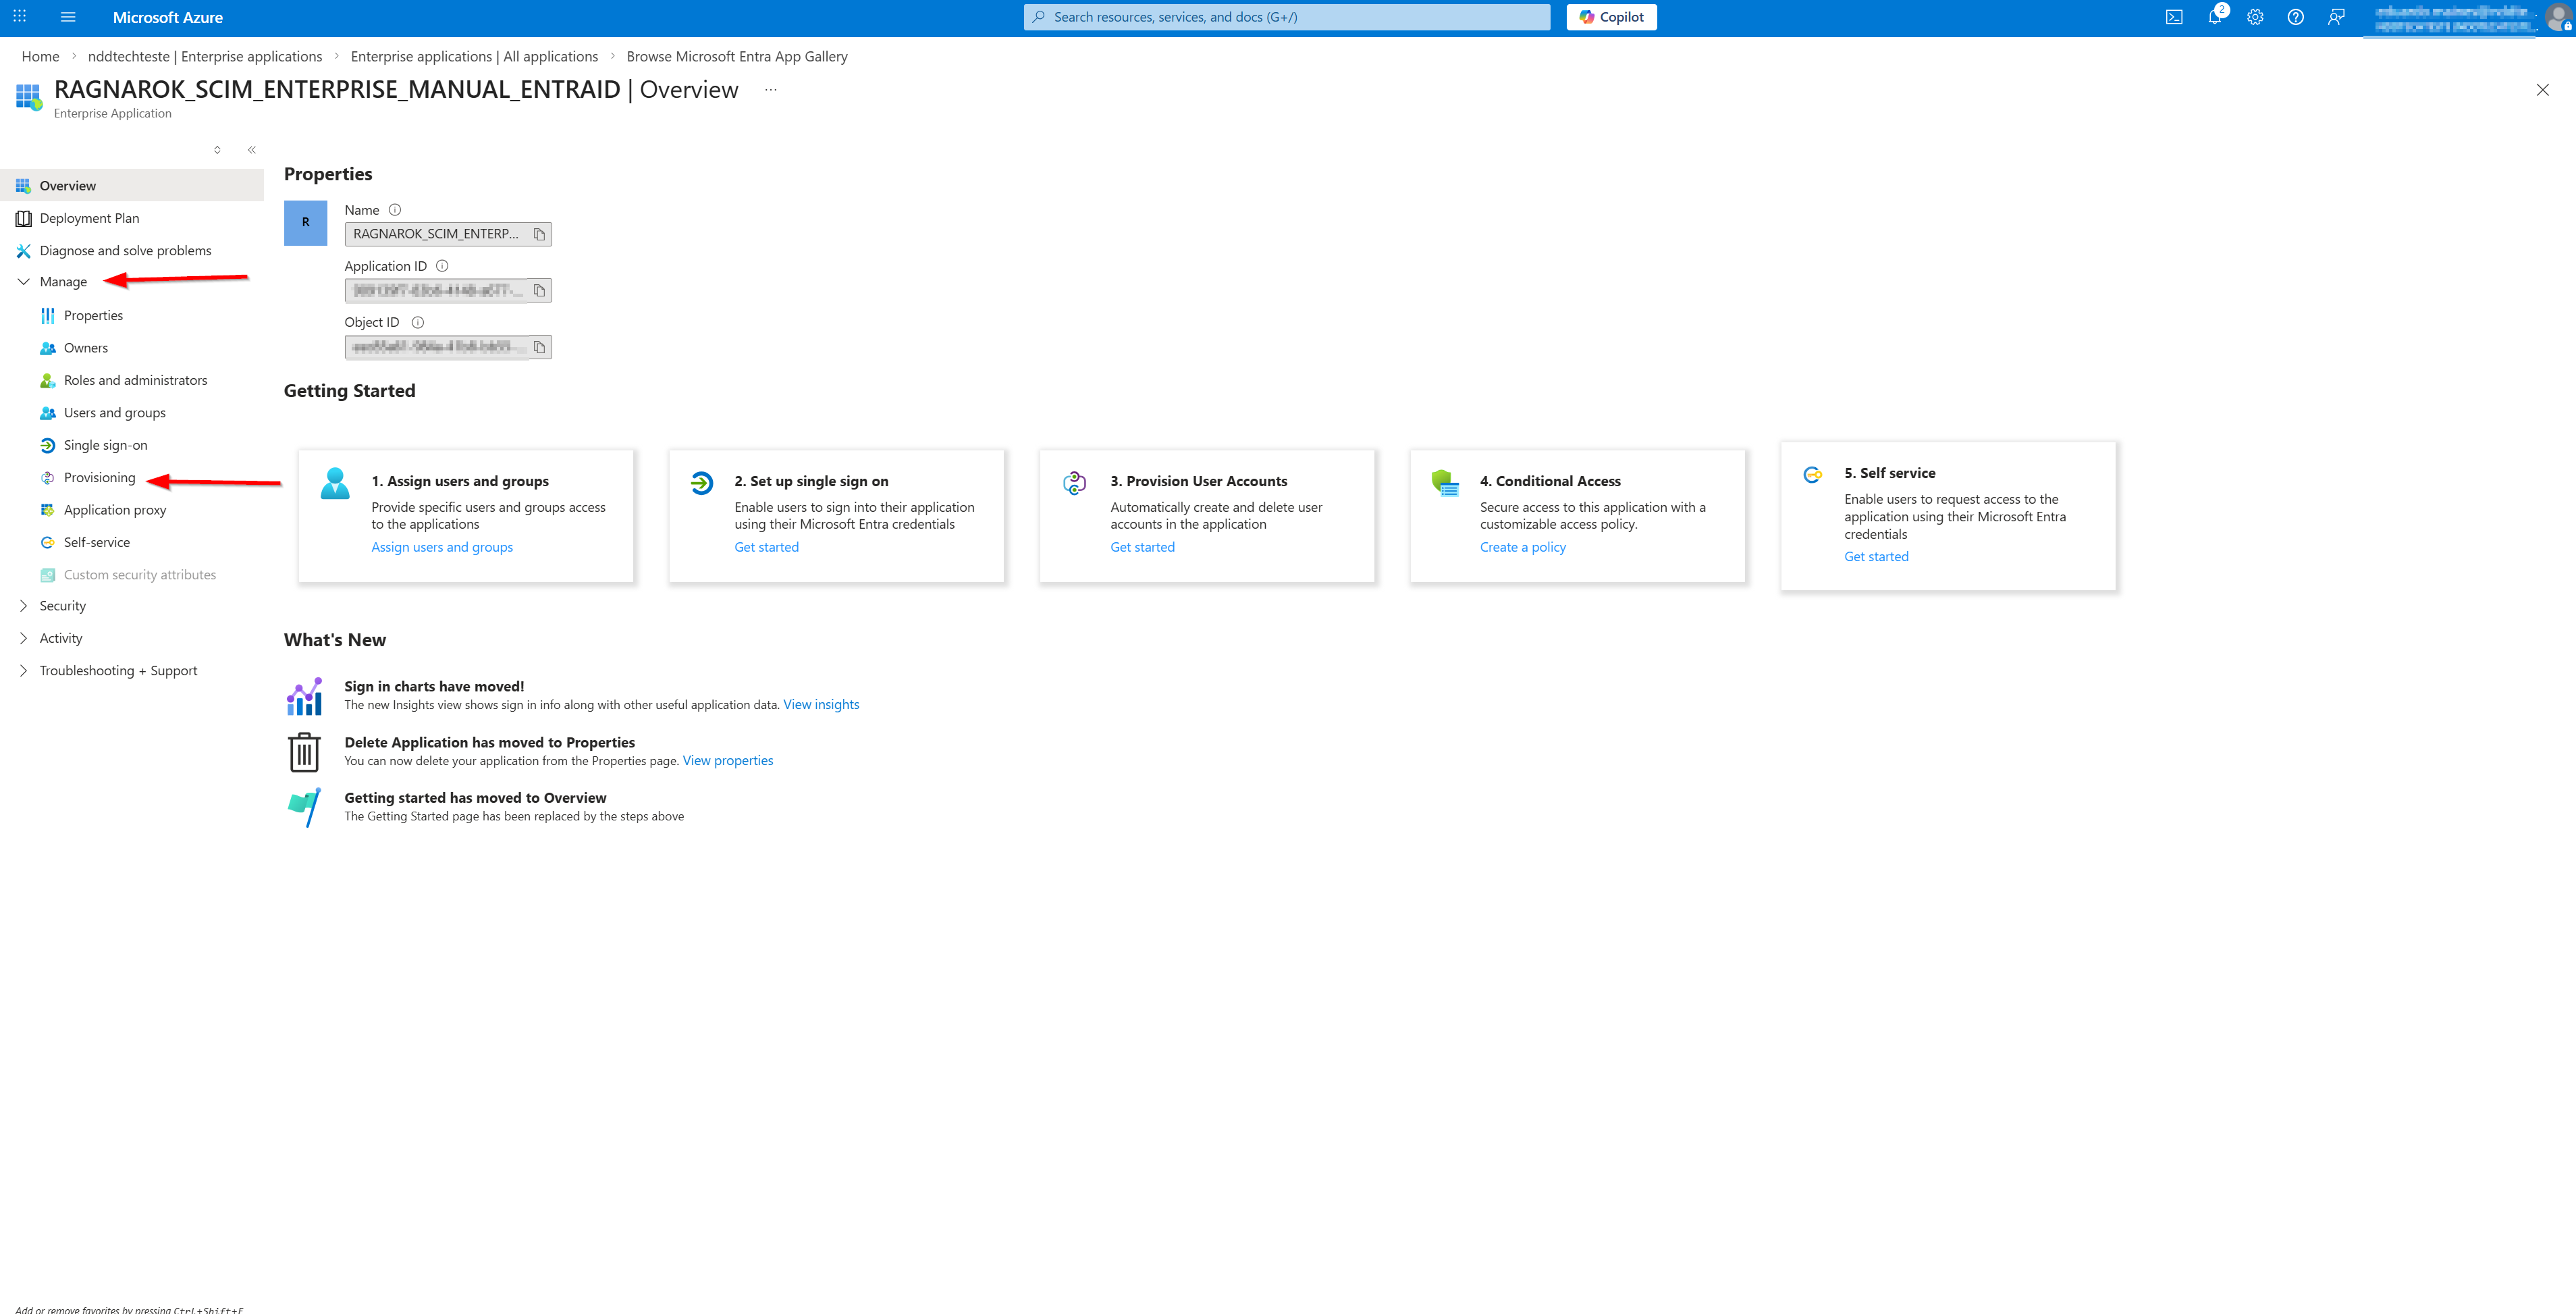
Once the application has been created, in the left-hand menu (under “Management”), click “Provisioning”:
-
On the Provisioning screen, under Overview, click ‘New Configuration’.
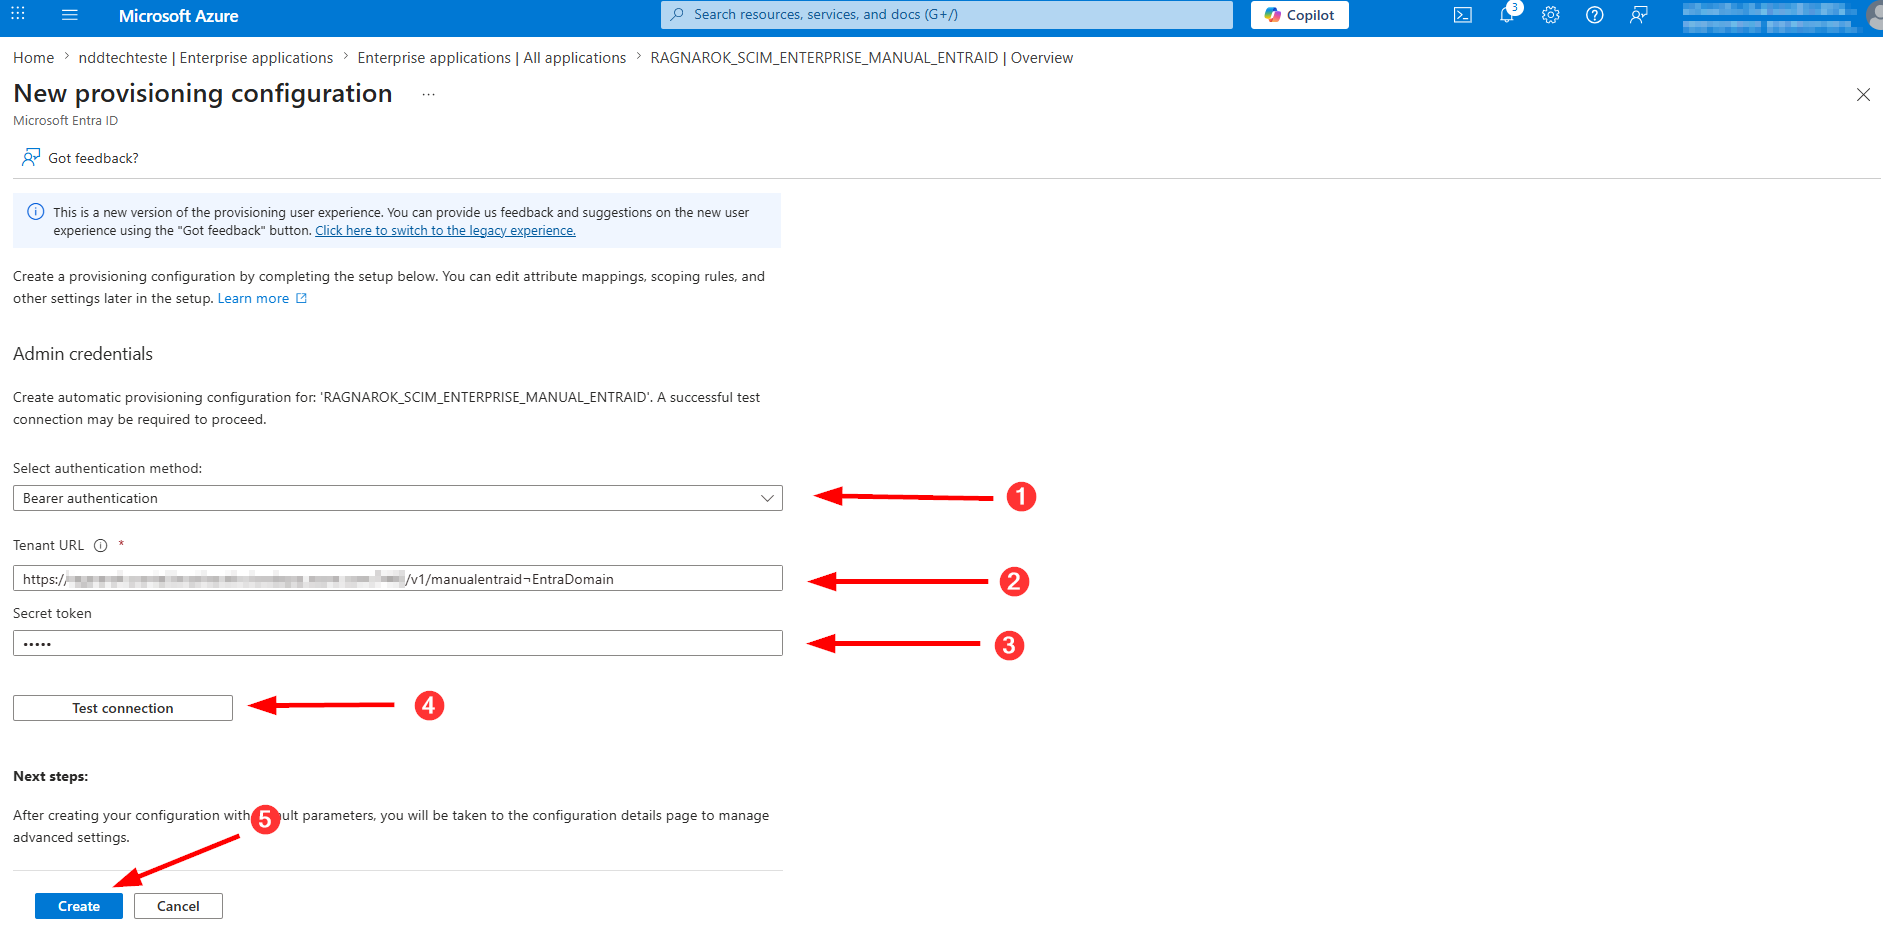
Fill in the fields:
-
Authentication method: Bearer Authentication
-
Tenant URL: The provisioning URL (SCIM) varies depending on the Data Center (DC) where the NDD Print Portal 360 environment is hosted.
Use the template corresponding to your Data Center:
-
Brazil (BR1):
https://360-scim.nddprint.com/v1/{CompanyName}¬{DomainName}
-
Brazil (BR2):
https://360-scim-br2.nddprint.com/v1/{CompanyName}¬{DomainName}
-
Europe (EU):
https://360-scim-eu.nddprint.com/v1/{CompanyName}¬{DomainName}
SELBETTI:
Do not use the ¬ character as a separator when configuring the Tenant URL. Doing so may cause an error in the environment.
The {CompanyName} information corresponds to the company name registered with NDD Tech. It can be obtained in the following ways:
-
When you log in to the NDD Print Portal 360, the name will be displayed in the upper-right corner of the screen.
-
In NDD Print Host, go to: Tools > Settings > Configure... > Company Name.
Important:
If you have any questions about which URL to use, please contact support or the person responsible for deploying the environment.
-
Secret Token Brazil (BR1):
BBD21C92-34CB-4483-B90E-DE0F83BEABCBNDDDCBR1SCIMF0F913CB-E66A-4E18-80F7-A27CC7EFE7A0
-
Secret Token Brazil (BR2):
F3081E6D-8317-464A-B384-5163C6302459NDDBR2SCIM60965F1C-8B35-4C65-929D-2604D7BF33F2
-
Secret Token Europe and Selbetti:
7A698477-1C0A-4F6B-8316-81271CAC5622NDDSCIM44FE4F84-527F-446E-B462-39E365FDB49D
-
Click ‘Test Connection’.
-
Click ‘Create’:
Configure Provisioning Properties
-
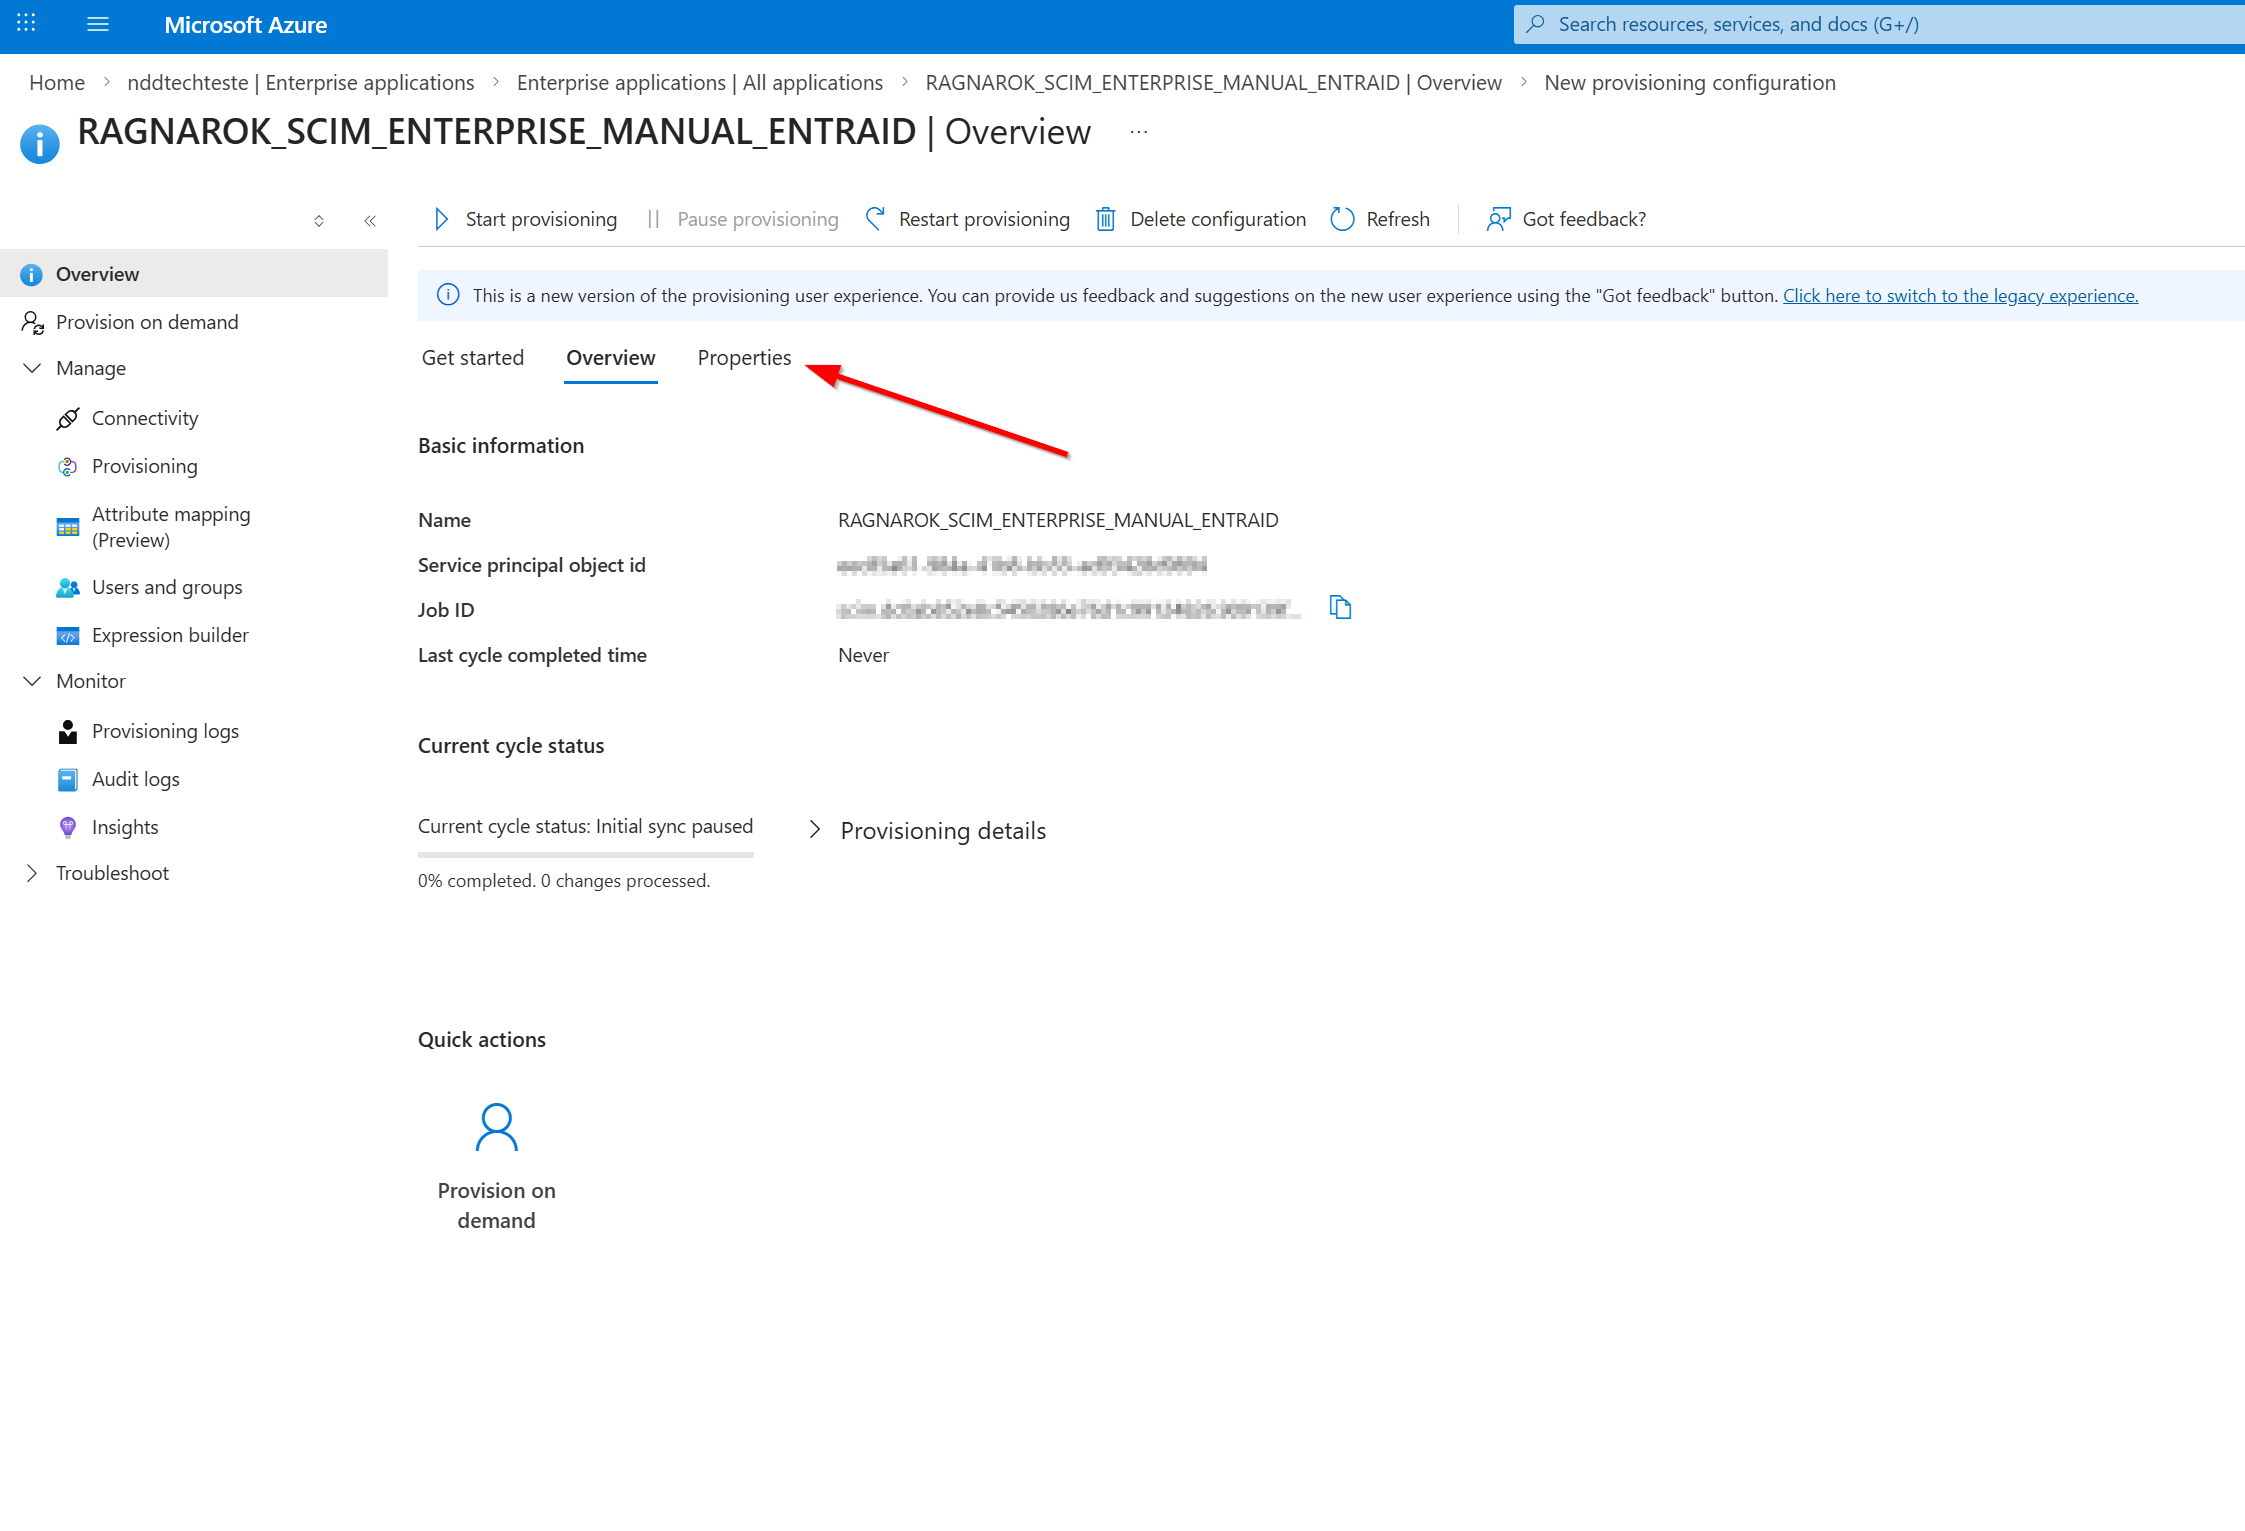
You will be redirected to Overview.
-
In the top menu of the main screen, click Properties:
-
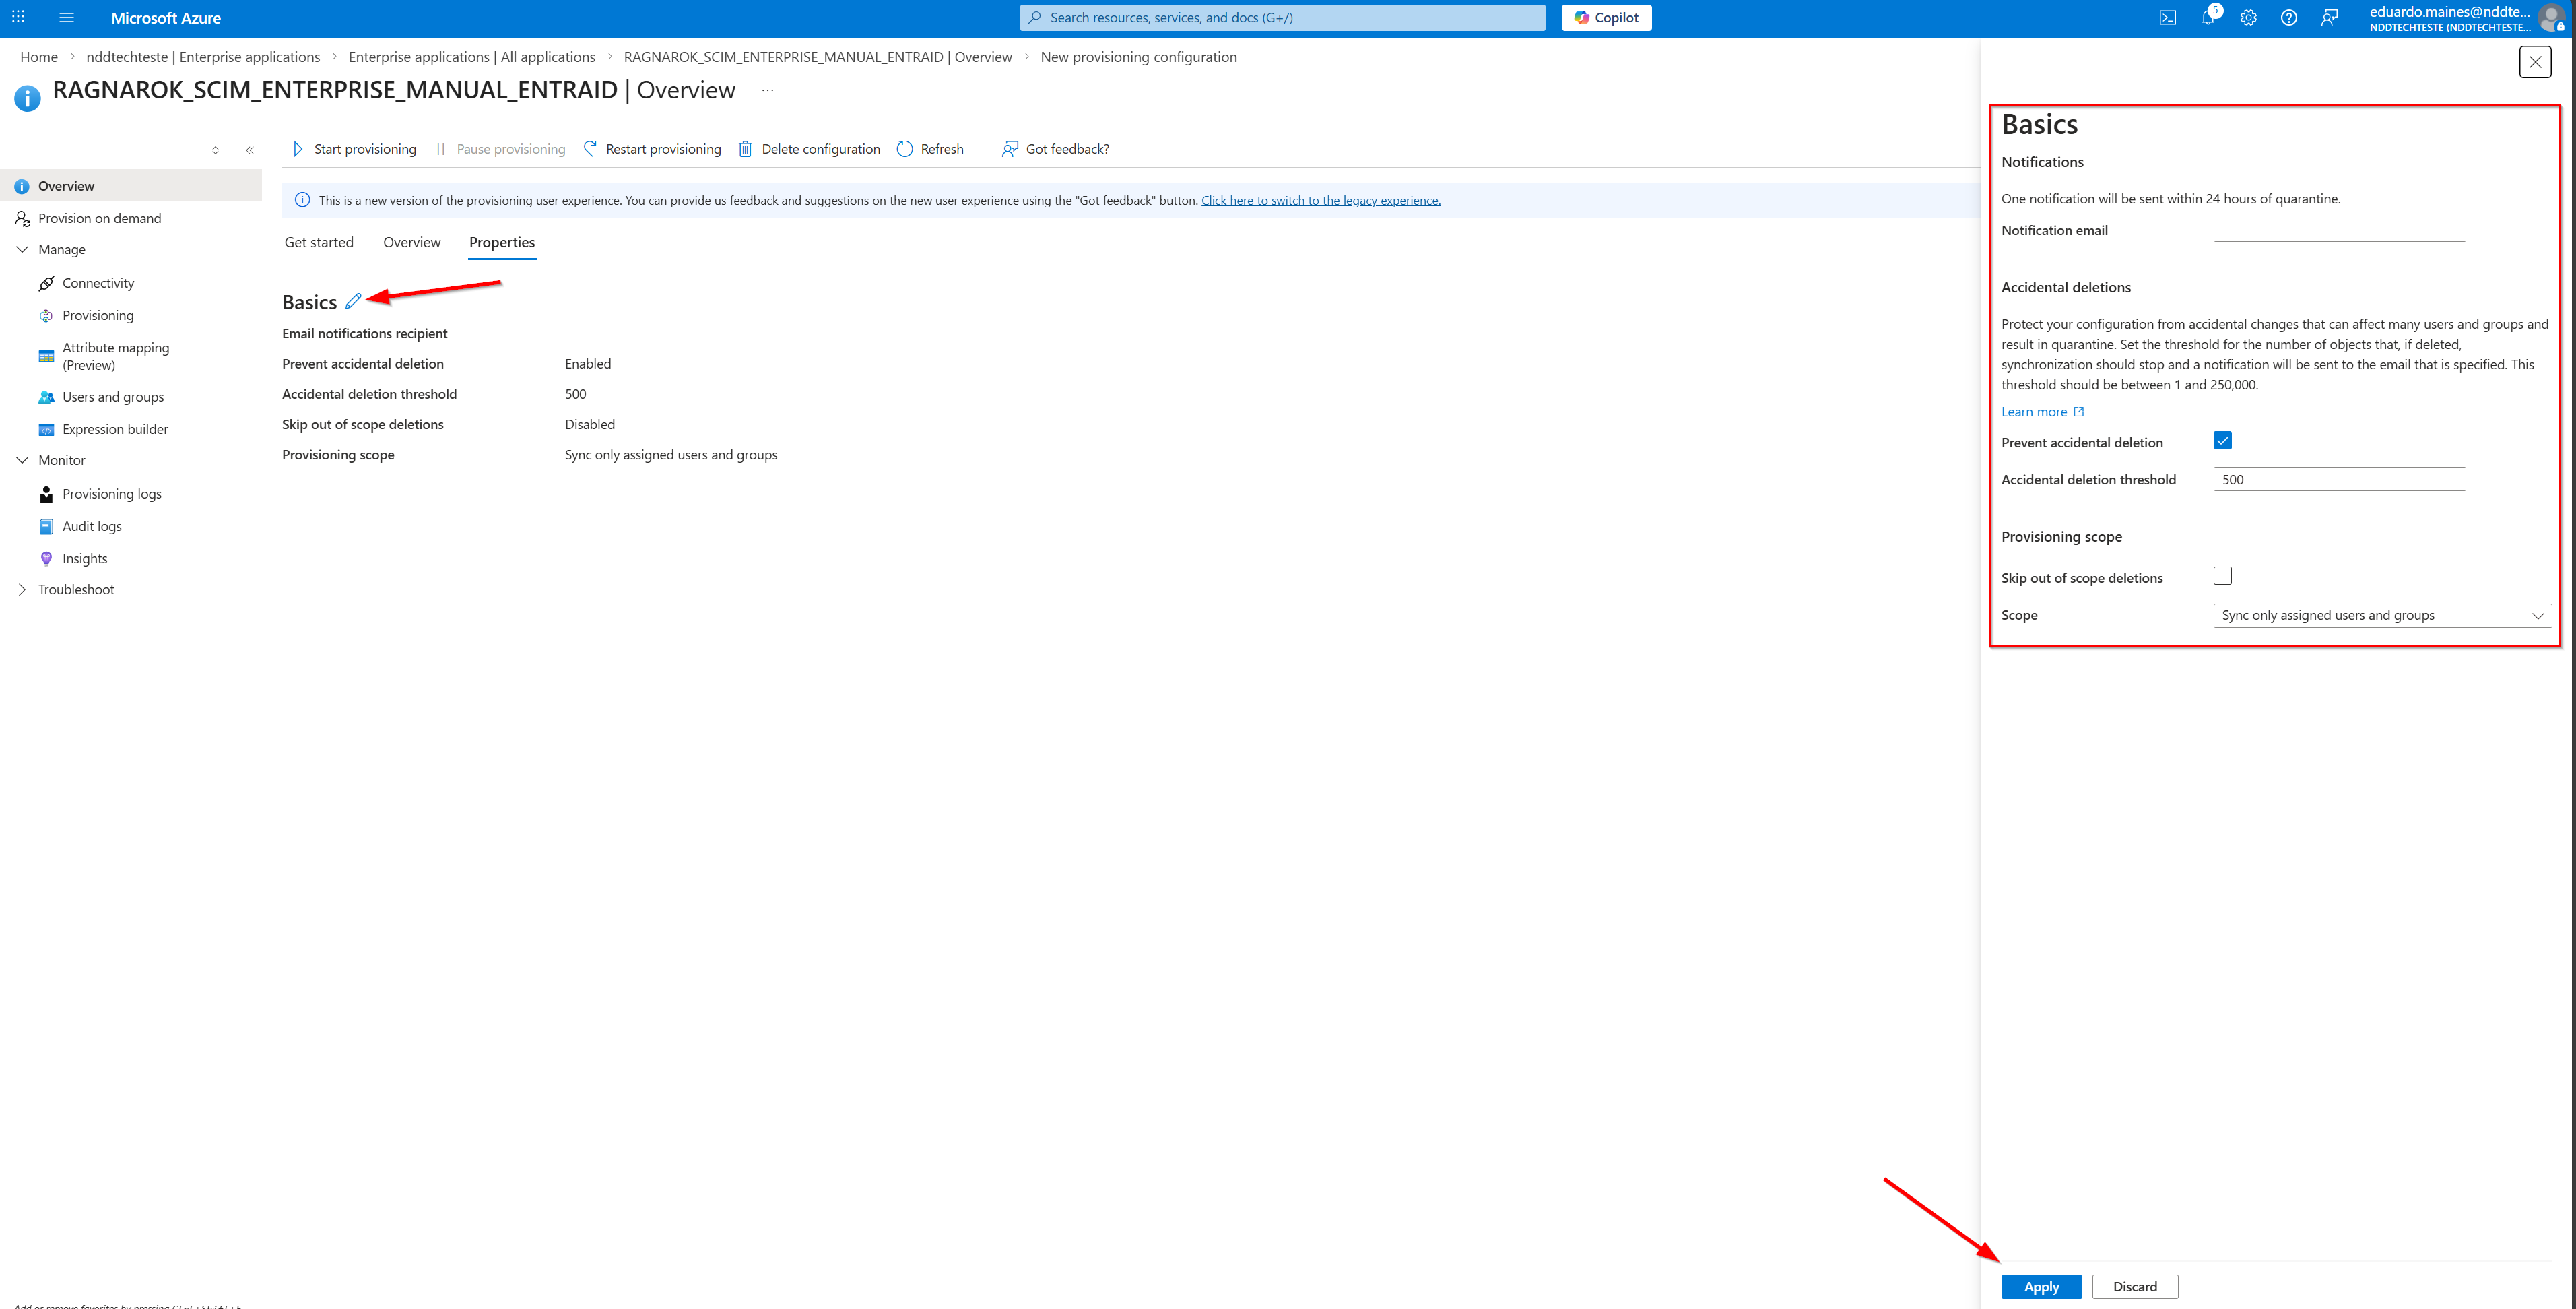
Click the pencil icon to edit the basic settings:
-
Fields and recommendations:
-
Notification Email: The email address that will be notified if provisioning remains in quarantine (stalled) for 24 hours.
-
Accidental Deletions:
-
NDD Print Portal 360 does not send commands to modify users or groups in Entra ID.
-
It only reads users and groups to synchronize with Portal 360.
-
-
Provisioning Scope (most important point)
-
Synchronize only assigned users and groups: You will need to manually assign the users/groups that should be provisioned in the enterprise application.
-
Synchronize all users and groups (Recommended): MS Entra ID will send all users and groups to Portal 360.
-
-
-
-
Click Apply/Save to save the settings.
If the scope is “assigned users and groups only” - Optional
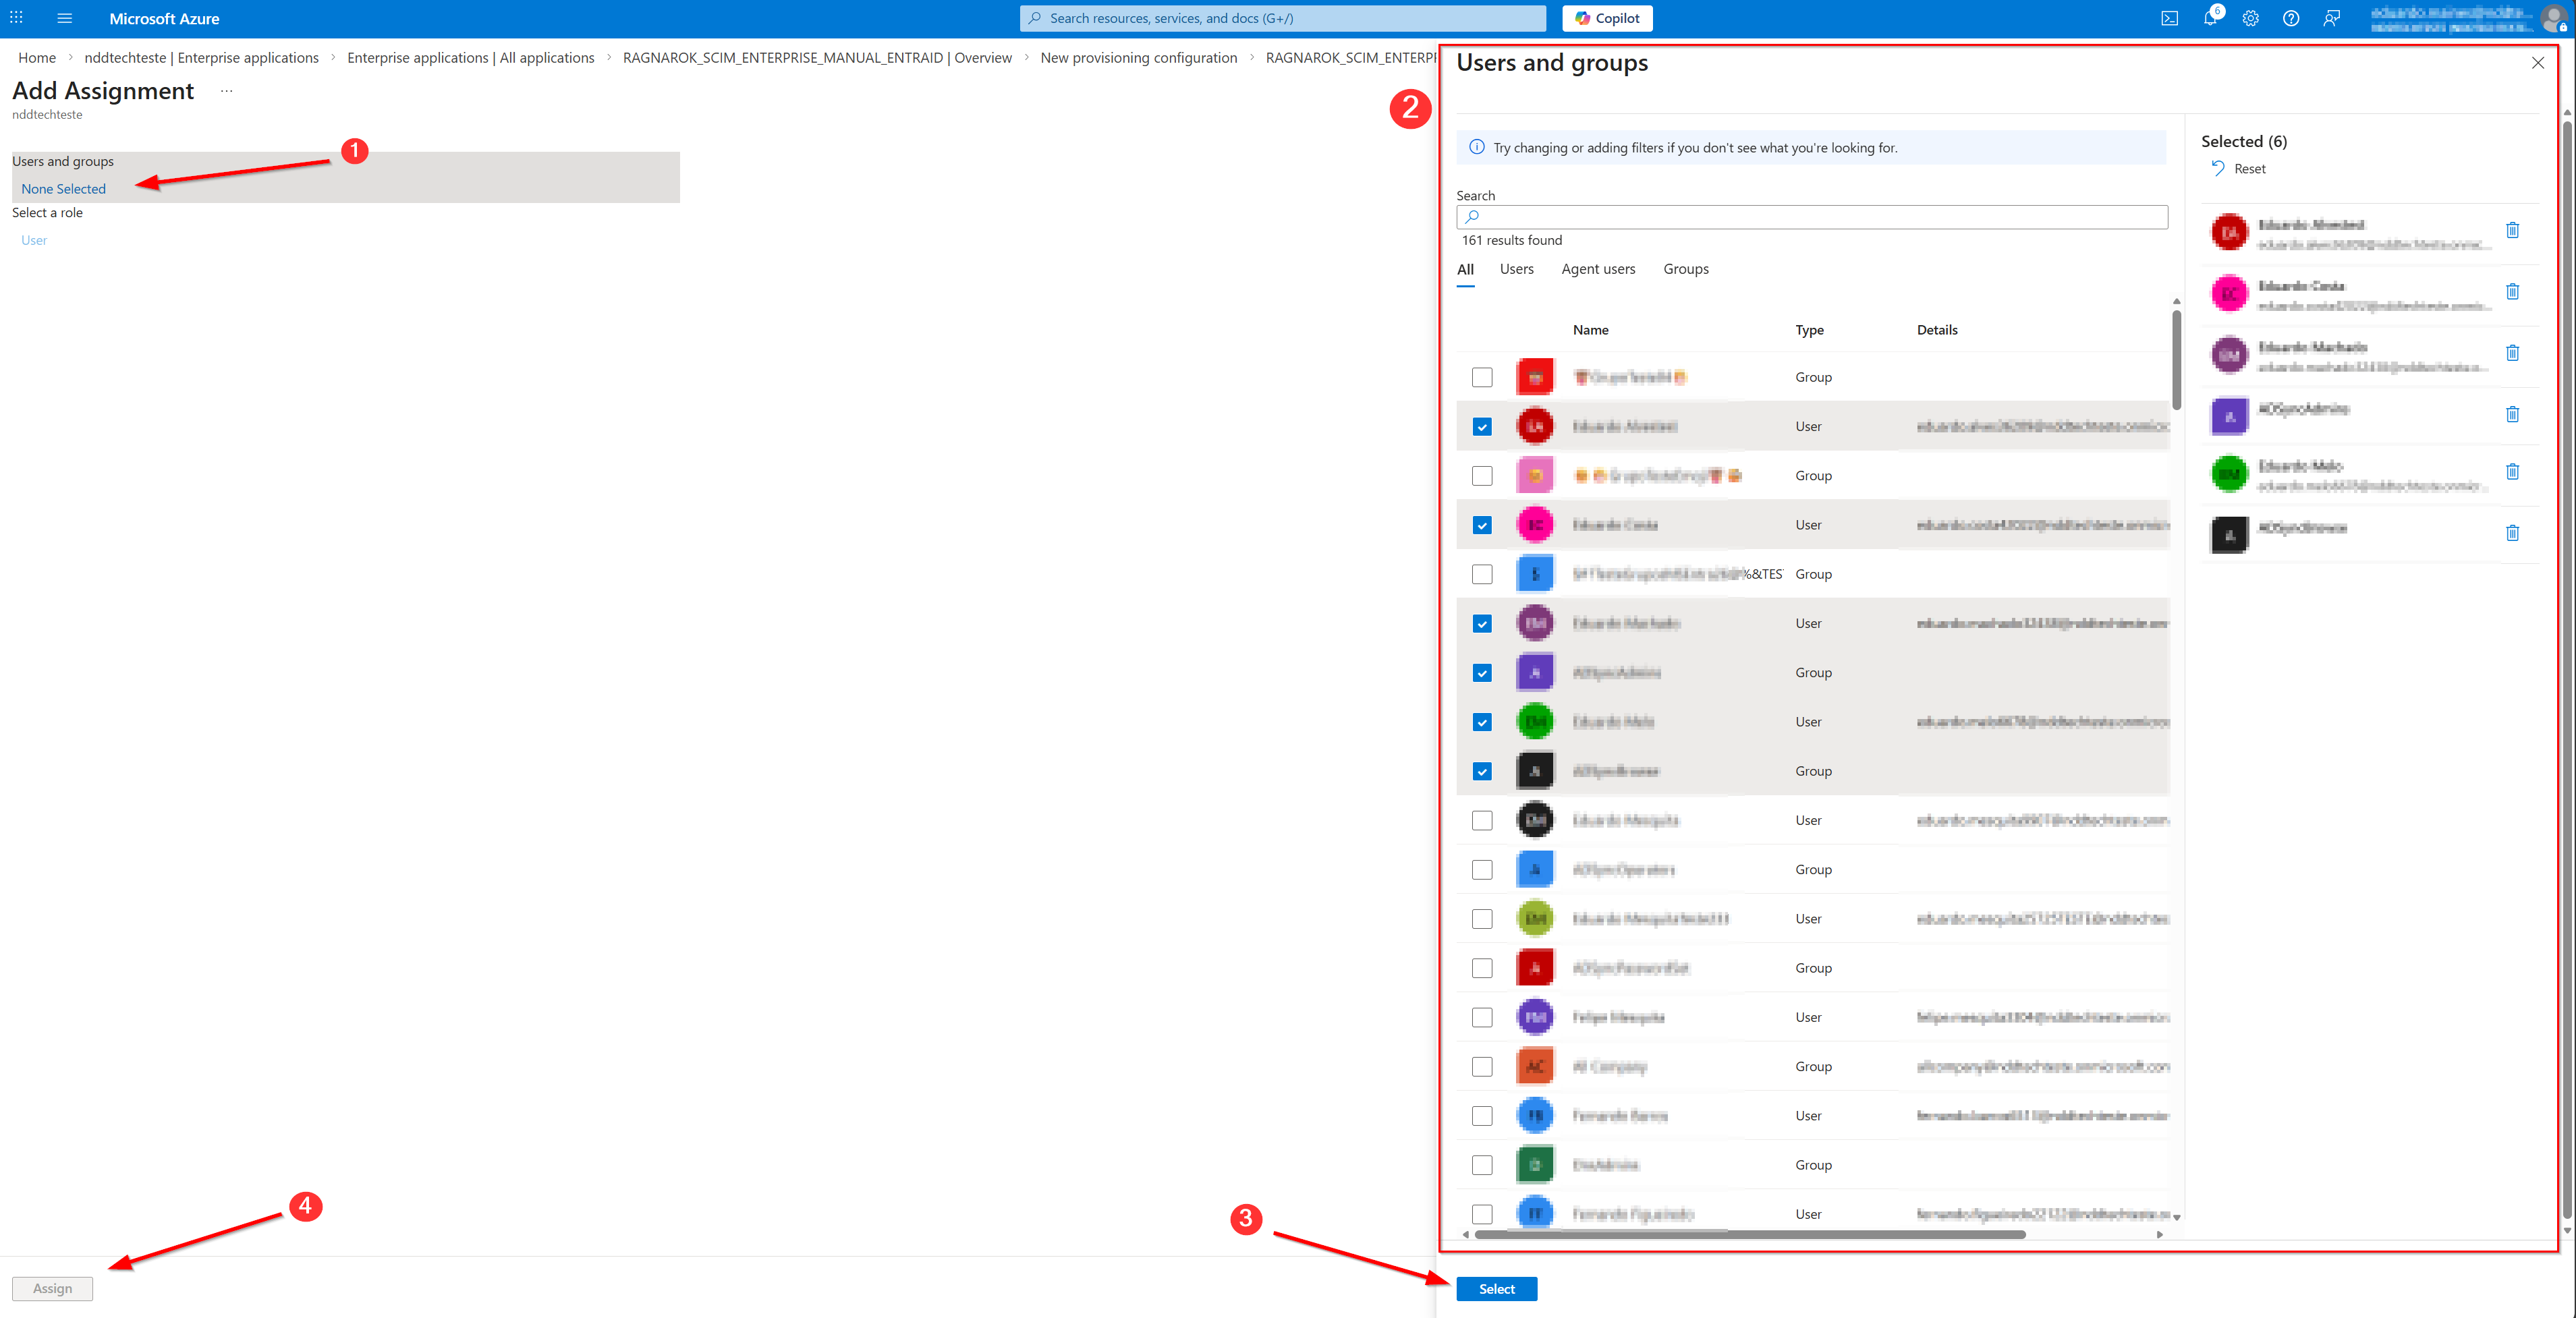
If you selected “Synchronize assigned users and groups only,” do the following:
-
In the left-hand menu, go to Users and Groups.
-
Click “Add User/Group.”
-
Click “Users and groups”.
-
Select the desired users and/or groups.
When you add a group, all users in the group will be provisioned, even if the user has not been assigned directly.
-
Click “Select” and then Assign:
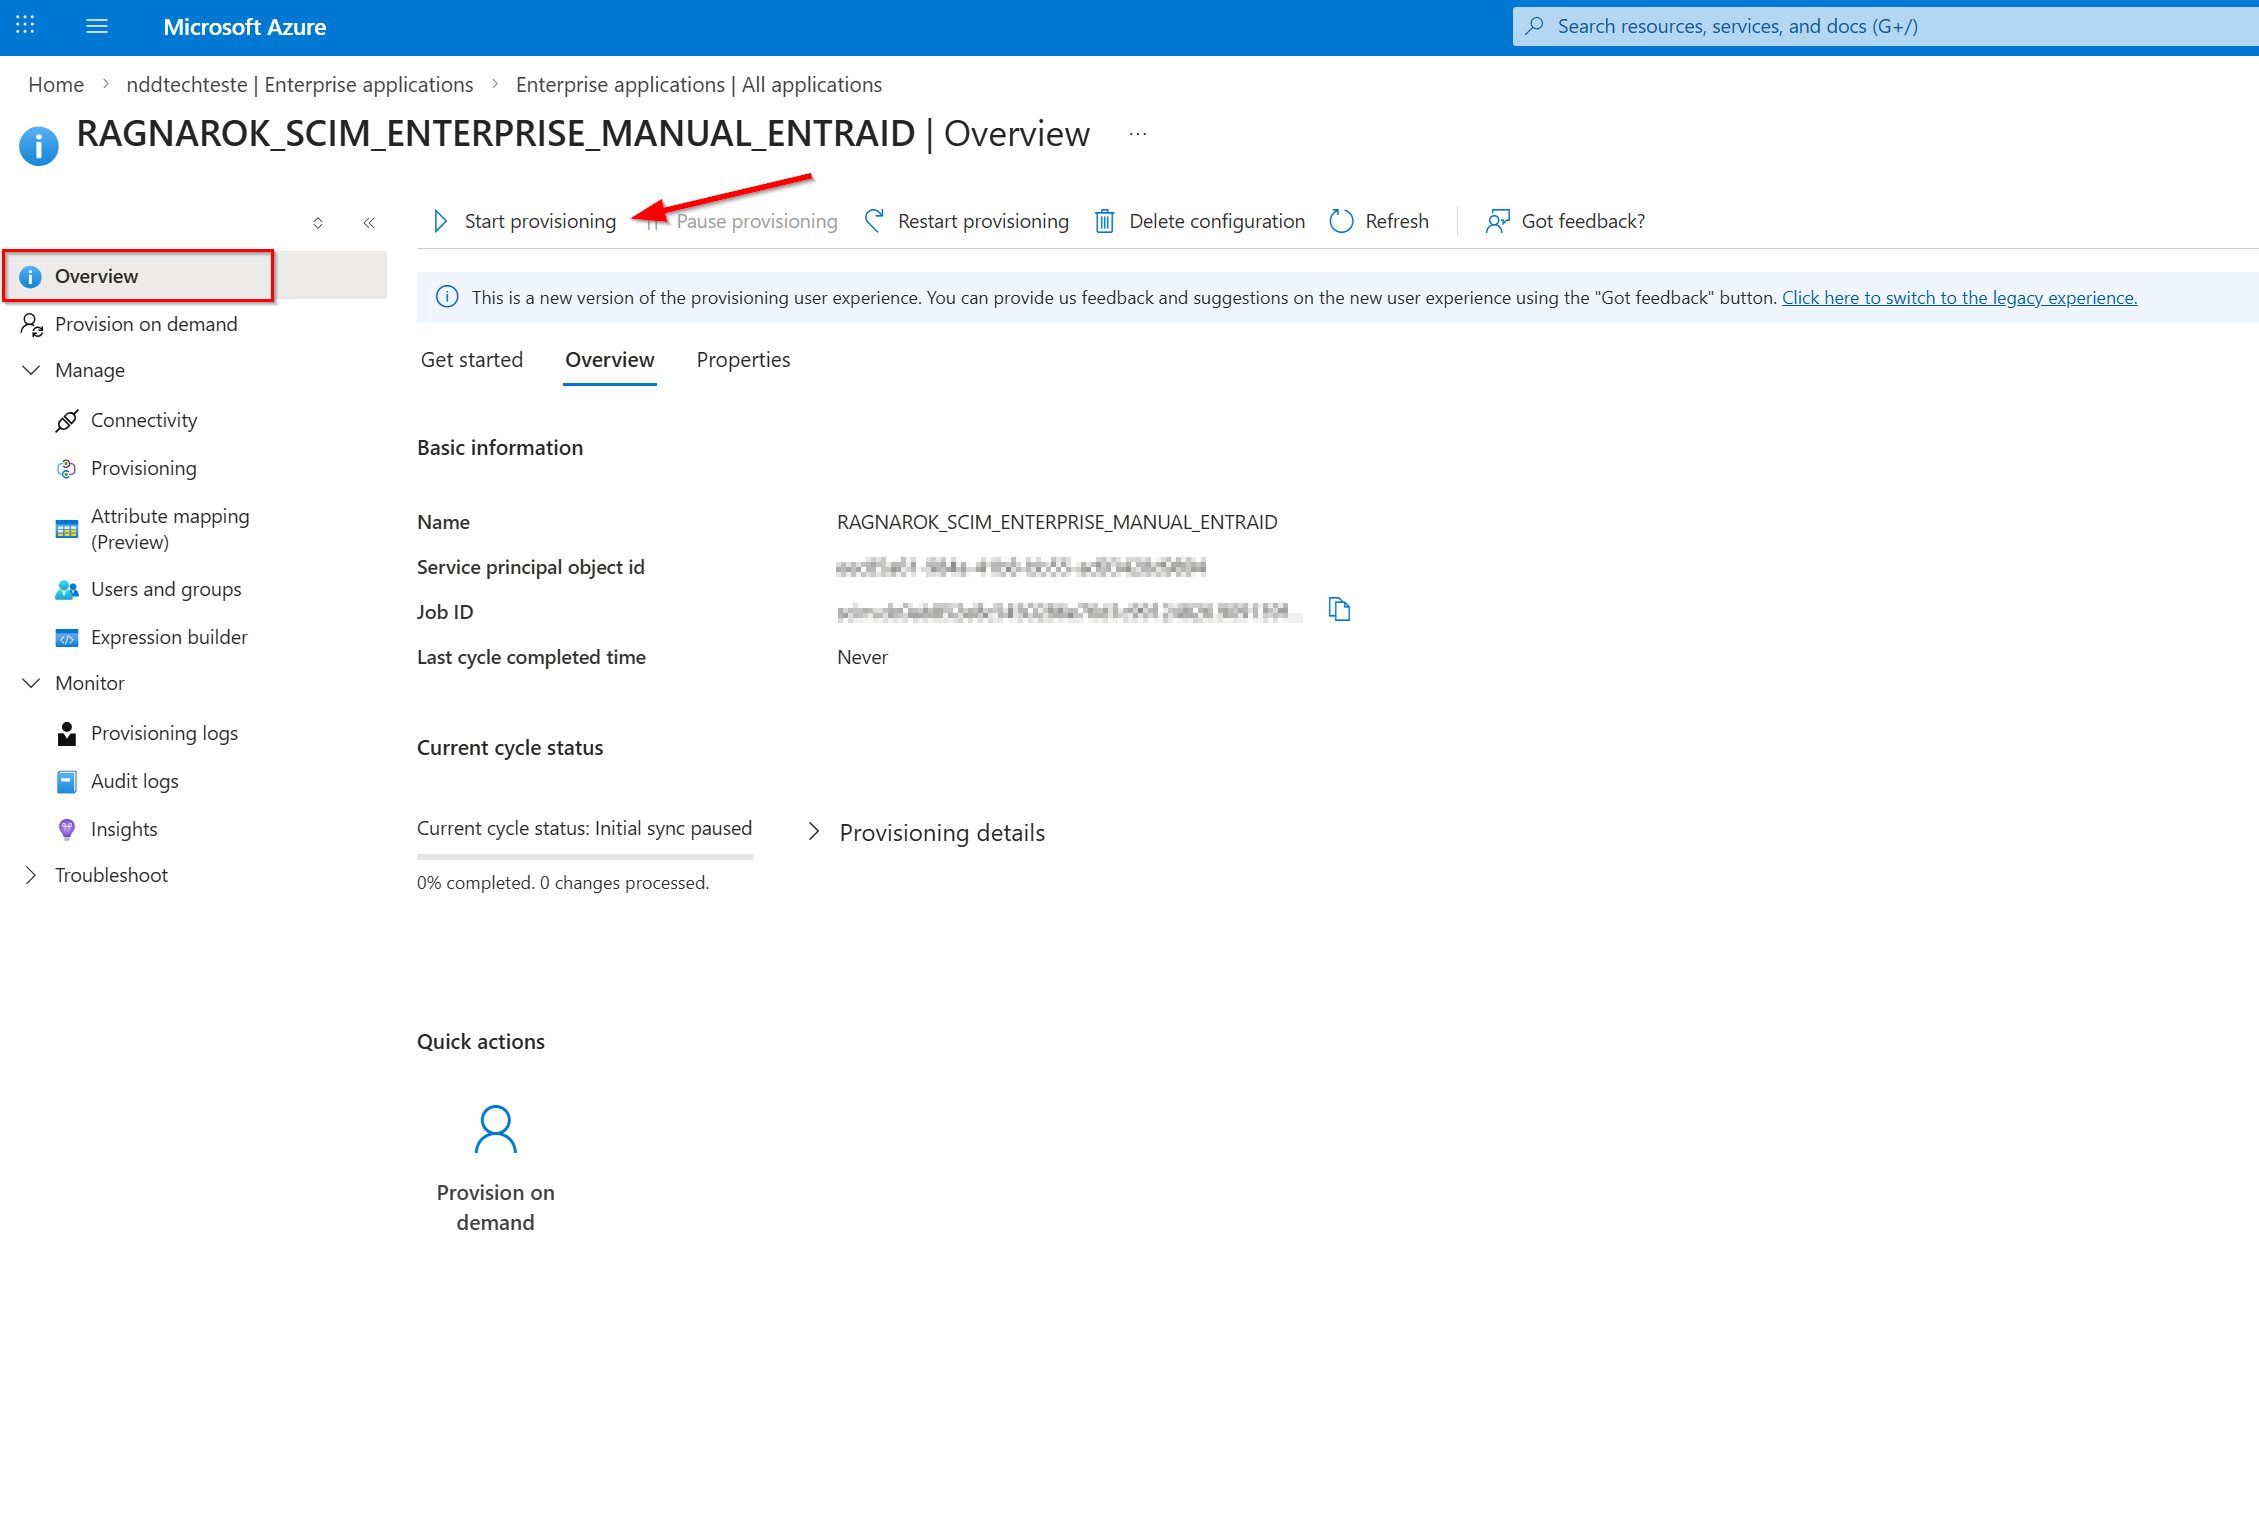
Start Provisioning
-
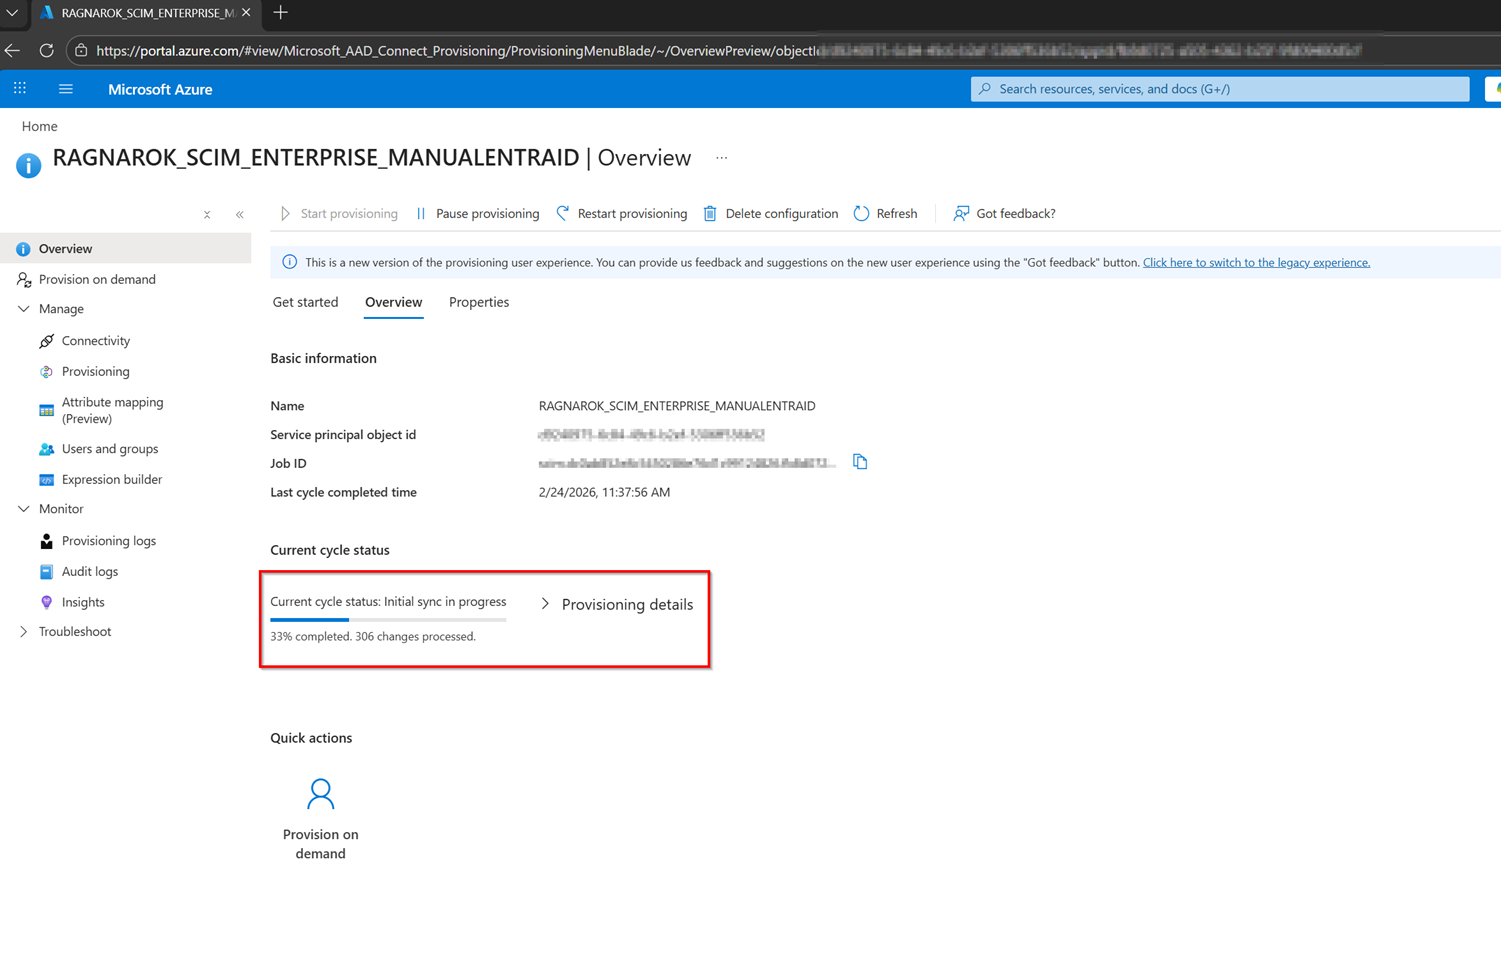
Return to the Provisioning “Overview” screen.
-
Double-check that the domain with Microsoft Entra ID in Portal 360 has already been created and configured.
-
Click the option to “start provisioning”:
-
The portal will display a message indicating that provisioning has begun:
-
Entra ID will gradually add users; in the ‘Overview’ section, you can monitor the progress bar: