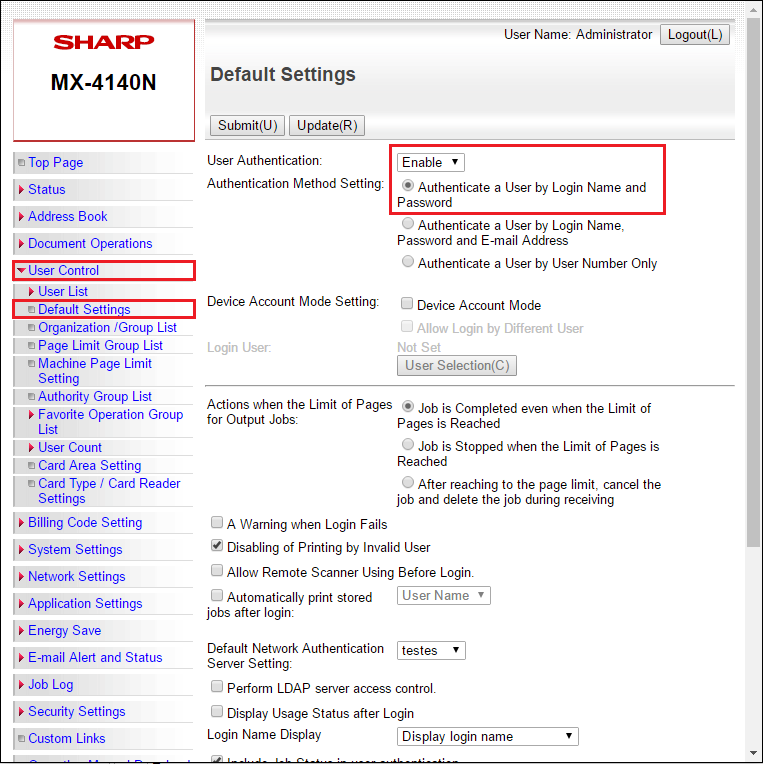
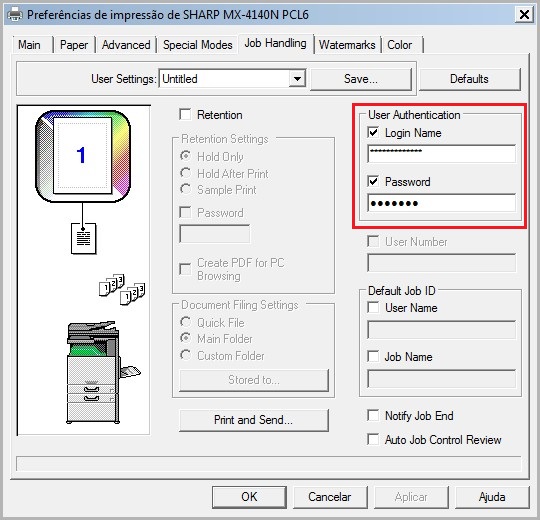
When using the printer without NDD Print authentication for accounting purposes only, to authenticate users correctly the printer authentication must be enable
This setting also causes users to have to authenticate them-self to the printer panel, counting copy, fax, and scan jobs for the correct user. To enable authentication on the printer, log on to the Web interface and follow the steps below:
-
Enter the administrative access credentials on the printer
-
Click "User Control"
-
Then "Default Settings", select the "Enable" option, and then check "Authenticate a User by Login Name and Password"
-
Click "Submit (U)" to save the changes
This process is just an example, and may change depending on the printer model.
Sharp OSA® Version 5 or later
-
At the top, click System Settings
-
In the list on the left, under Authentication Settings, click Default Settings
-
Select the User Authentication option as Enable
-
Select the Authentication Server Settings option as Sharp OSA.
.png?cb=94a26e5c542d50c676f6b9c126728d2e)
|
|