Important Notes
-
AirPrint / Bonjour: Unlike the processes used in Windows architecture, macOS systems also automatically search the network for connected printers. However, in this case, the system itself performs the installation of the printer, which may result in unwanted devices appearing in the NDD Print Agent module. This is a behavior inherent to the macOS architecture but can be disabled. To disable this feature, learn more.
-
Specific drivers: Some drivers use third-party software to process print jobs, which may generate incompatibility with our solution. In such cases, you must open a support demand with NDD so that our technical team can evaluate and approve the driver.
To use the NDD Print Agent version for macOS, you must update the NDD Print Agent installed on the server to the new version.
Approved operating systems
|
Stations |
|---|
|
macOS Monterey (12) |
|
macOS Ventura (13) |
|
macOS Sonoma (14) |
|
macOS Sequoia (15) |
|
macOS Tahoe (26) |
Hardware
|
Processor Architectures |
|---|
|
Intel 64-bit (Intel64) |
|
ARM (Apple Silicon) |
Environment
|
HTTPS communication allowed
|
|
Commands to manage module services Stop the NDD Print Agent services
Start the NDD Print Agent services
Restart NDD Print Agent services
Restart CUPS services
Start the NDD Print Agent admin application (Requires administrator privileges)
|
Directory Structure
Since this structure differs from that of a Microsoft architecture, the NDD Print Agent module for macOS uses the following directories:
|
Logs
Definitions
Work folder
|
Pre-installation Checklist
Before installing the NDD Print Agent, check the three configurations below.
Ignoring these checks usually prevents the NDD Print Agent from starting or communicating over the network.
-
Rosetta 2 - required on Macs with Apple Silicon (ARM) to run the NDD Print Agent
-
Firewall - allows incoming connections to the NDD Print Agent
-
Communication Ports - TCP ports 56569 through 56571 must be open and accessible between the Mac, the NDD Print Host, and the NDD Print Releaser
1. Rosetta 2
Macs with an Apple Silicon (ARM) processor require Rosetta 2.
There are two ways to install Rosetta 2: through the macOS pop-up window or manually via Terminal.
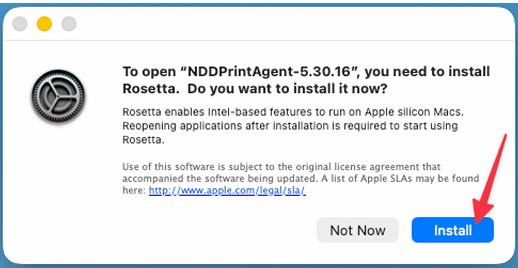
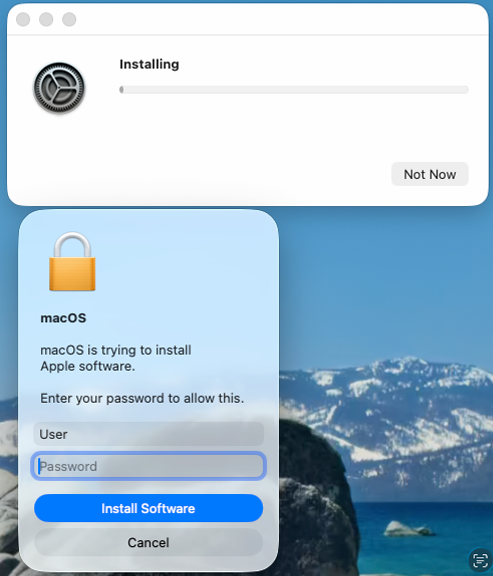
Option A — Install via the pop-up window.
When you open an Intel-based application, such as NDD Print Agent, macOS will automatically prompt you to install Rosetta 2.
Click Install, enter an administrator’s credentials to authorize the installation, and wait for the process to complete.
Option B — Install via Terminal
Open the Terminal app (Applications > Utilities > Terminal), run the command below, and wait for the confirmation message.
softwareupdate --install-rosetta --agree-to-license

2. Firewall
If the macOS Firewall is enabled, you must allow incoming connections for the NDD Print Agent. Otherwise, communication over TCP port 56571 will be blocked, preventing the exchange of print jobs between the NDD Print Agent and the server.
-
Access the Firewall settings
-
macOS 13 or later:
-
go to System Settings > Network > Firewall > Options
-
-
Earlier versions:
-
go to System Preferences > Security & Privacy > Firewall > Firewall Options
-
-
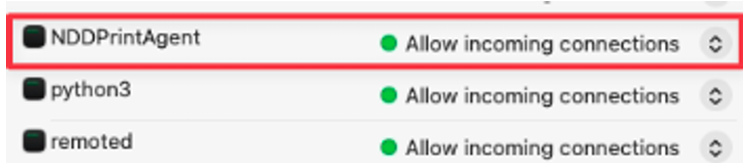
Allow connections to the NDD Print Agent
Verify that the NDD Print Agent service is configured with the Allow incoming connections option.
If it is not, change the configuration to ensure communication with the server.
-
Click OK to apply the changes.
3. Communication Ports
The NDD Print Agent uses three TCP ports to communicate with the server.
Before beginning the installation, make sure the ports are open in the macOS firewall and in any firewall between the Mac and the server.
The ports must also remain open during and after installation, as the NDD Print Agent needs to connect to the NDD Print Host to complete the configuration.
|
Porta TCP 56569 |
Communication with the NDD Print Host |
|
Porta TCP 56570 |
Communication with the NDD Print Releaser |
|
Porta TCP 56571 |
Communication Between Agents (Server ↔ Mac) |
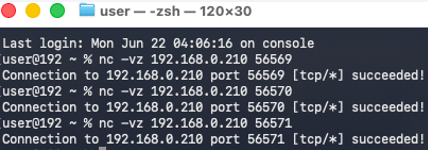
Testing the Communication Port via the Terminal
Replace Server_IP_Address with the server's address. A result of “Succeeded” confirms that the port is accessible.
nc -vz Server_IP_Address 56569
nc -vz Server_IP_Address 56570
nc -vz Server_IP_Address 56571