To perform the NDD Print Agent installation on macOS, follow the necessary Installation prerequisites.
Installation via installation package
-
Download the NDD Print Agent for macOS
-
Locate the installation file with the name
NDDPrintAgent-5.30.X.zip -
Double-click the file to unzip it. You'll have a new file named
NDDPrintAgent-5.30.
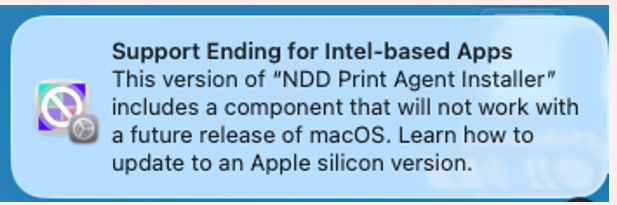
During installation, macOS may display a compatibility warning. This is because the current version of NDD Print Agent was developed only for Intel processors. However, this warning does not prevent you from using the application, which will continue to operate normally after installation.
-
Run the NDD Print Agent macOS installer
-
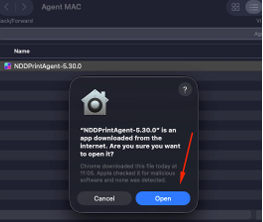
A security pop-up window will appear asking if you're sure you want to open the application. Click Open to continue.
-
If macOS blocks the installer, you may see a message stating that the app is from an unidentified developer or that its origin could not be verified.
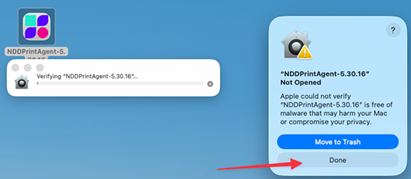
To allow the installer to run:
-
Open System Settings > Privacy and Security
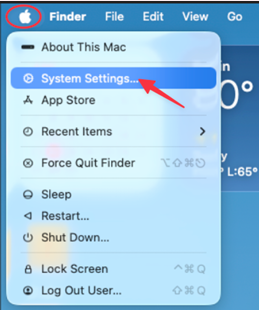
-
Scroll down to the Safety page
-
Find the message stating that the NDD Print Agent has been blocked to protect your Mac
-
Click Open Anyway
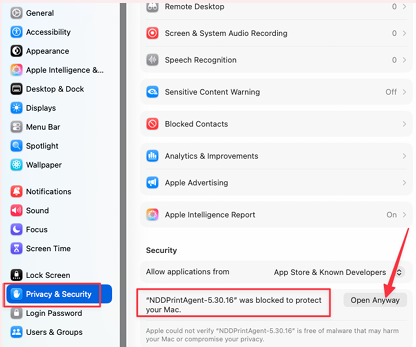
-
In the confirmation window, click Open
-
Open the installer again to continue the installation.
-
Select the language and click Next
-
Click Next on the welcome screen
-
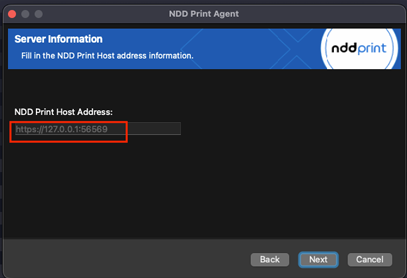
Enter the full URL (IP and port) where NDD Print Host is installed
-
Like this: https://IP_Servidor:56569
-
-
Click “Next” on the installation startup screen
At that point, you will be prompted to enter a user with administrator privileges
-
Wait for the installation to finish, then click Finish
After installation, you must restart the equipment.
Since this structure differs from that of a Microsoft architecture, the directory structure used by the NDD Print Agent macOS module is as follows:
Logs Directory
-
/opt/ndd-print-agent/log
Settings Directory
-
/opt/ndd-print-agent/settings
Working Directory
-
/opt/ndd-print-agent/workfolder
Default NDD Print Auditing Directory
-
/opt/ndd-print-agent/workfolder/auditing
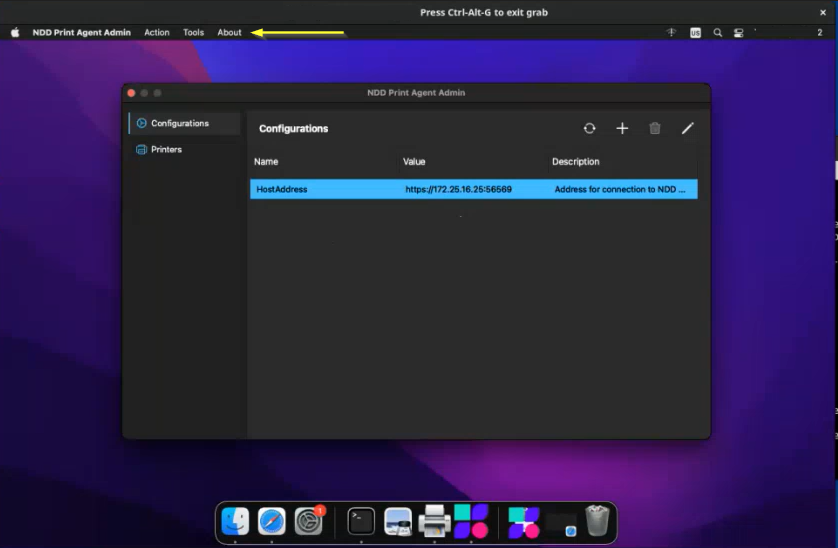
Changed Visual Layout
Unlike other operating systems, when you install the NDD Print Agent module, the menu bar (toolbar) does not appear at the top of the application window, but rather at the top of the screen. This is due to a feature of Apple’s architecture: