
To enable document scanning to OneDrive via NDD Print Portal 360, each company must have an app registration in the corresponding Microsoft Entra ID tenant.
The registration must be created by a Microsoft Entra ID administrator for the company or by someone with the necessary permissions in the tenant.
1. Register the app
-
Go to the Azure portal
-
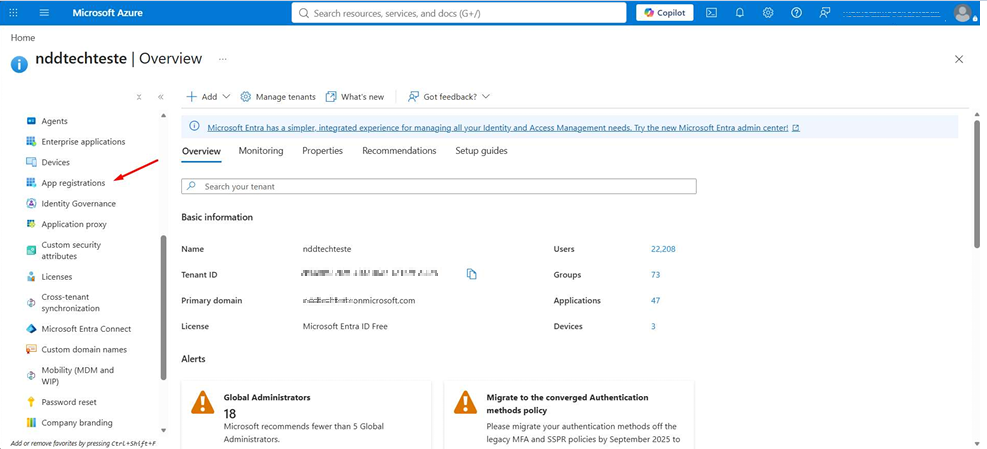
Go to Microsoft Entra ID > App registrations > New registration
-
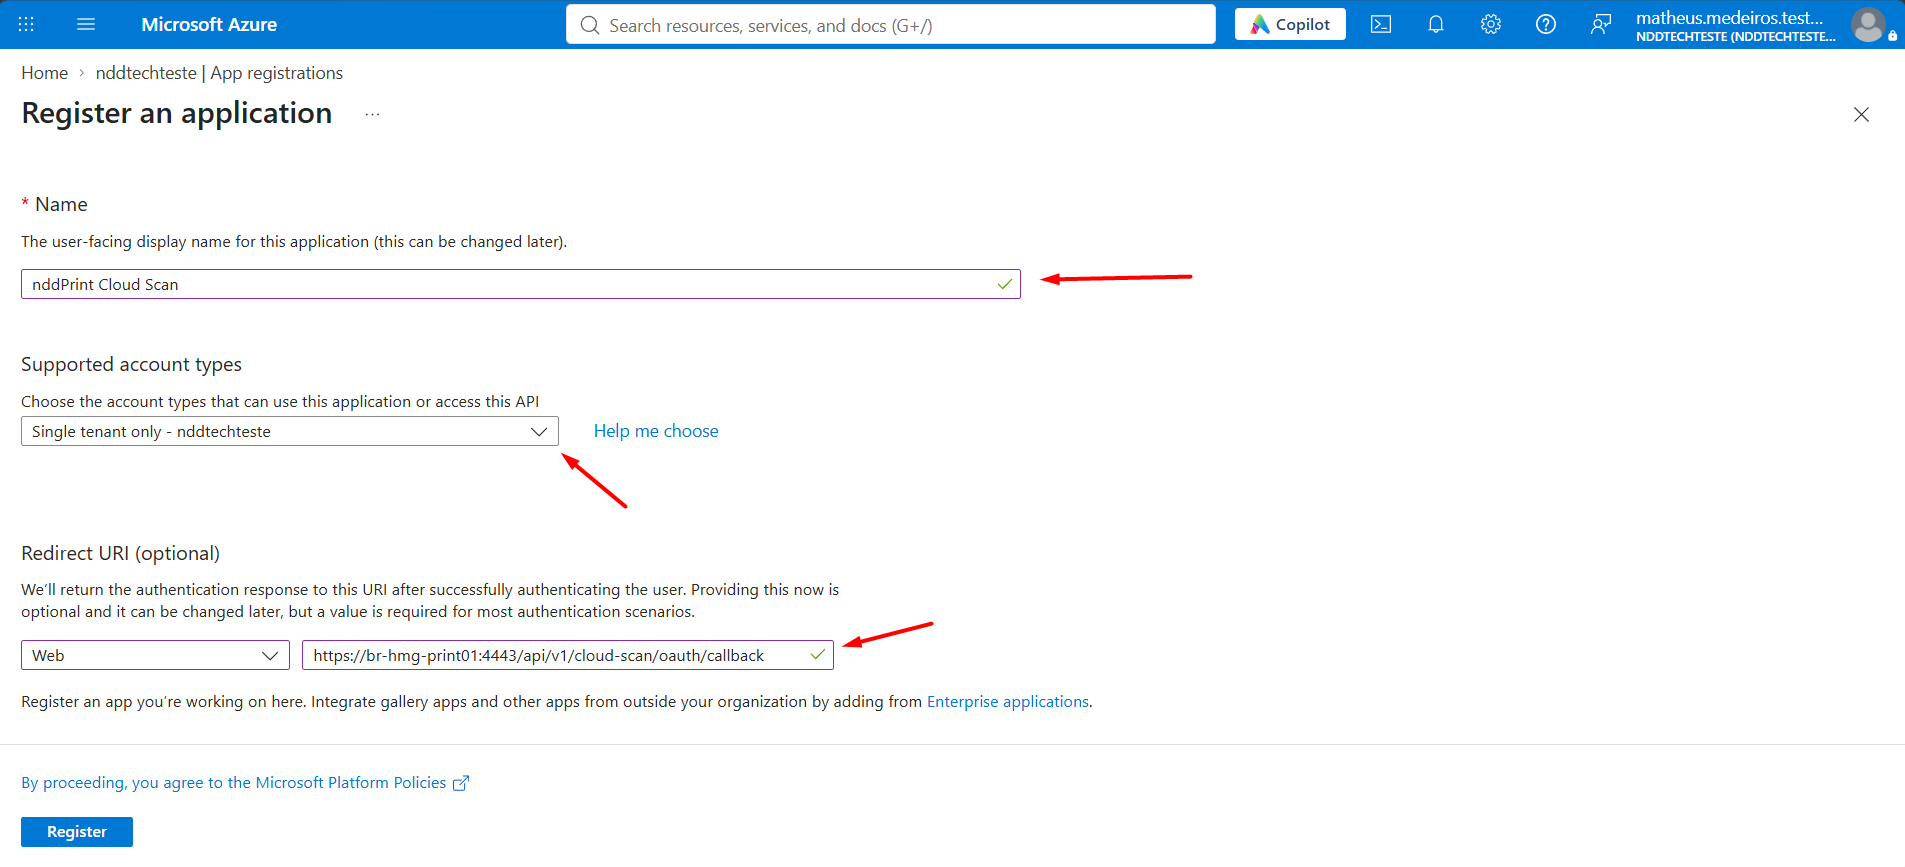
In the Name field, enter a name that helps identify the application.
-
Under Supported account types, select the option for accounts in this organizational directory only (single tenant).
-
Under Redirect URL, select the Web platform and enter a valid callback URL for the environment.
-
Click Register.
Redirect URL
The callback path is the same for all environments:
/api/v1/cloud-scan/oauth/callback
The full URL varies depending on the environment:
-
NDD Print 360 Portal Server (local):
-
Enter
https://{public-host}:{port}/api/v1/cloud-scan/oauth/callback. Replace{public-host}with the environment’s public host and{port}with the port configured for the ITS API. The suggested port is 4443, but it can be customized during installation. Use the port configured in the environment.-
Example:
https://br-hmg-print01:4443/api/v1/cloud-scan/oauth/callback
-
-
-
NDD Print Portal 360 (cloud/DC):
-
Use the DataCenter’s fixed URL.
-
For the Europe Data Center, enter
https://its-eu.nddprint.com/api/v1/cloud-scan/oauth/callback.
-
-
2. Copy the application identifiers
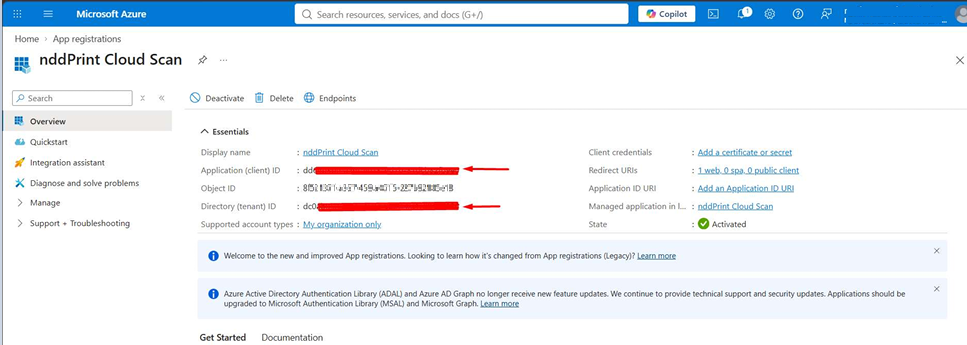
On the application’s Overview page, locate and copy the following values:
-
Application (client) ID: This will be entered in the Client ID field in NDD Print Portal 360.
-
Directory (tenant) ID: This will be entered in the Tenant ID field in NDD Print Portal 360.
Do not use the Object ID in place of these identifiers.
3. Create a Client Secret
-
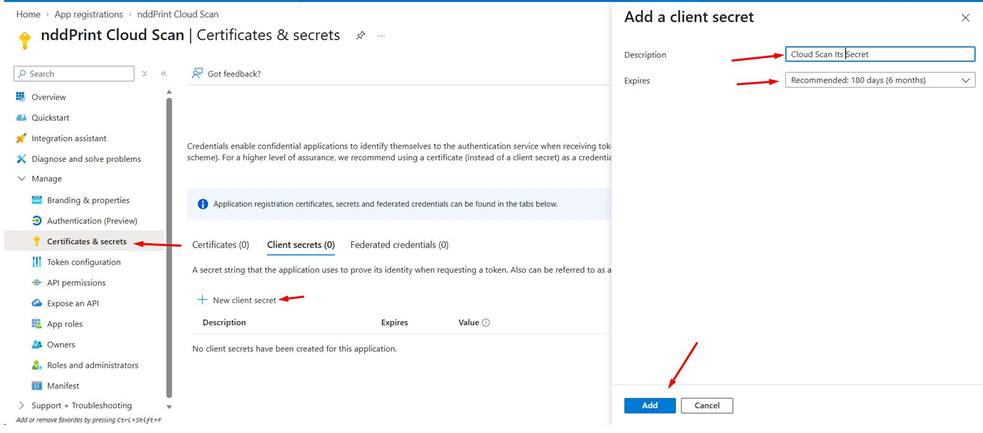
In the app menu, go to Certificates & secrets
-
Select New client secret
-
Enter a description and select the validity period according to company policy.
-
Click Add
-
Copy the value displayed in the Value column and save it in a safe place.
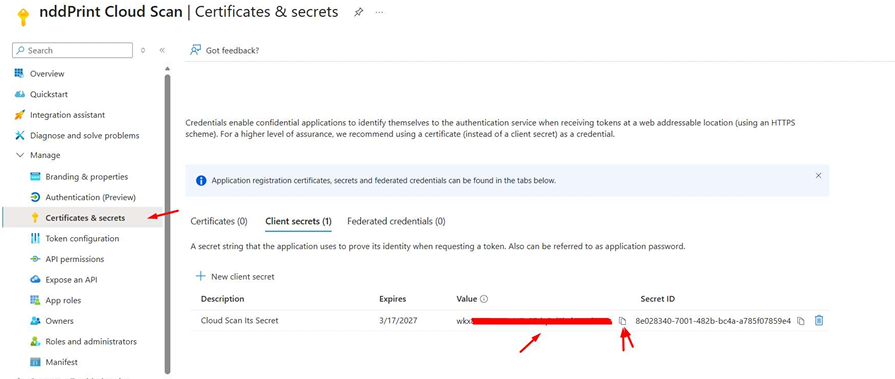
In the NDD Print Portal 360, enter the value you copied into the Client Secret field.
Please note: The key has an expiration date. Renew it before it expires and update the value in the NDD Print Portal 360. If it expires, the connection test may return an error.
4. Verify the redirect URL
-
In the application menu, go to Authentication (Preview) > Redirect URL configuration.
-
Confirm that the platform is set to Web.
-
Verify that the registered URL is exactly the same as the valid callback URL for the environment, including the scheme, host, port, path, case sensitivity, and trailing slash.
For the NDD Print 360 Portal Server (on-premises), verify that the port matches the one configured in the environment.
For the NDD Print Portal 360 (cloud/DC), use the fixed URL for the corresponding Data Center.
5. Configure API permissions
-
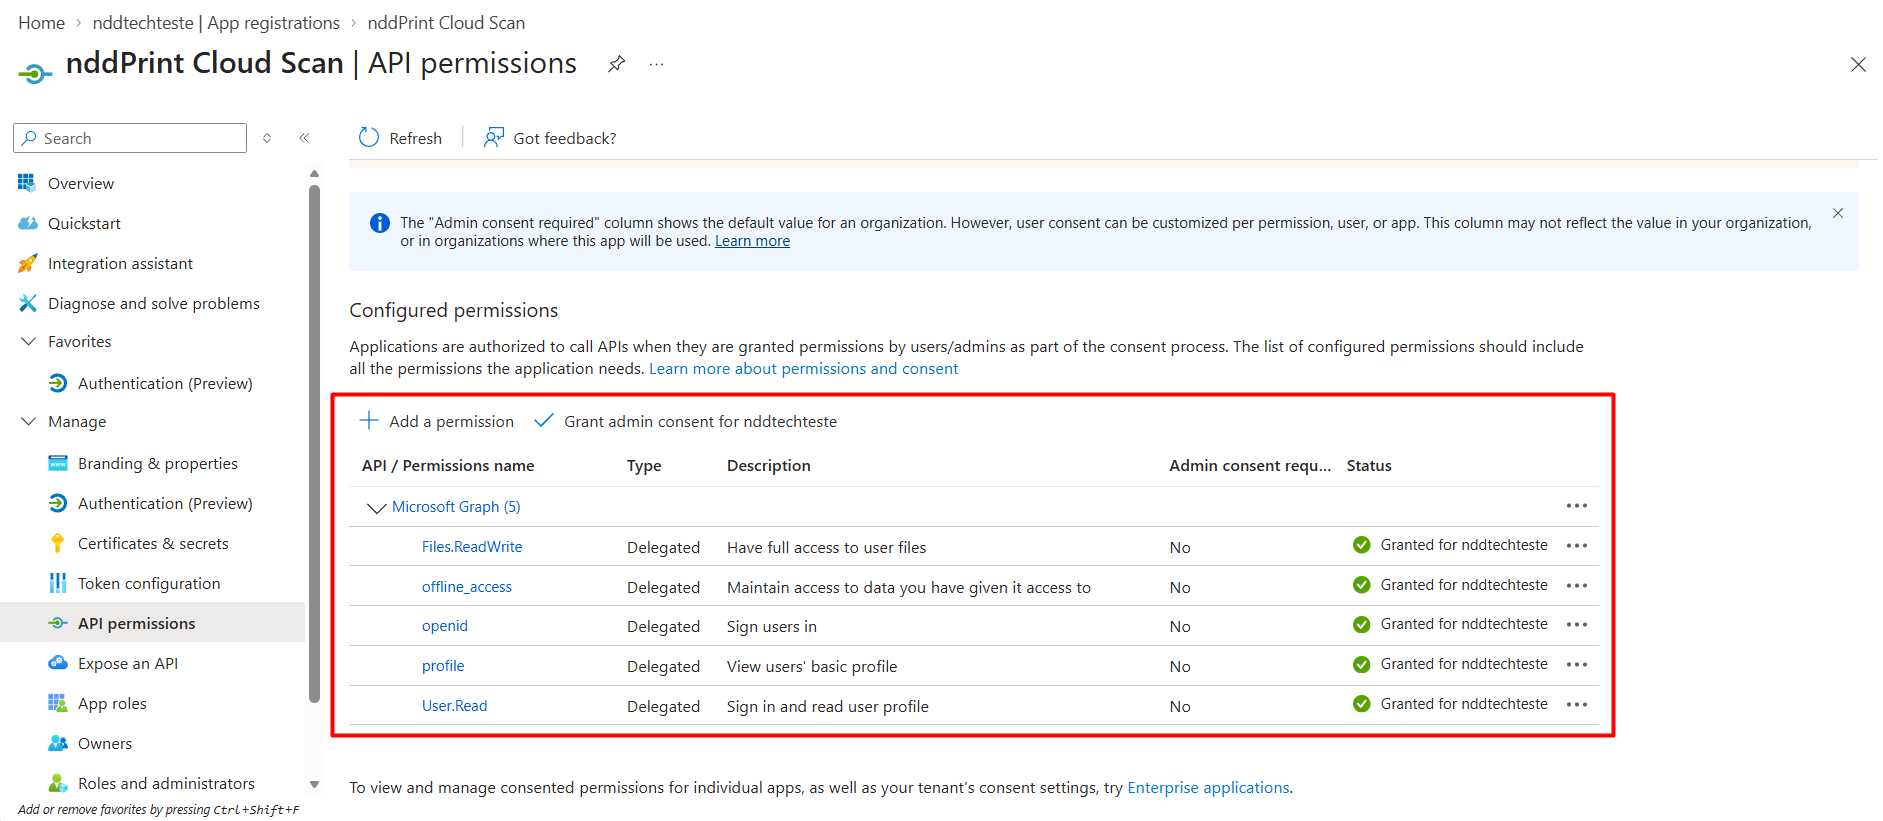
In the menu, go to API permissions.
-
Select Add a permission > Microsoft Graph > Delegated permissions.
-
Add the following permissions:
|
|
Authenticate the user and confirm their identity. |
|
|
Request basic information from the user's profile. |
|
|
Allows NDD Print Portal 360 to receive a refresh token and renew the user's authentication without requiring a new login. This feature helps keep the session and login cache active. |
|
|
Allows the NDD Print Portal 360 to read the basic profile information of the authenticated user to perform the Microsoft login and the authentication required for the PIN change. |
|
|
Read and edit files owned by the logged-in user. |
-
Select Grant admin consent to grant consent to the tenant, in accordance with company policy.
6. Configure the app in NDD Print Portal 360